
I knew the paneling was pretty old. In fact it was 3/4 inch thick solid oak. People don't put that kind of paneling up anymore.. plus it had at least 2 different colors of paint on it, so it had seen better days.

When I removed the base cabinets next to the fridge you could not only see the two different paint colors, but you could also see the original oak.. clearly the stuff was old. It must have matched that lame oak crown molding near the ceiling. Now why the heck wasn't that painted white too?
 The original oak color (to the left of the fridge.) In this picture you can also see how thick the boards actually were, the brown line on the left hand side of the image is where the molding has been removed and the original color of the board is showing.
This was going to be ugly.
Here goes nothing...
 OH SHIT!
The entire wall was crumbling. It was being held up by a sheet of what appeared to be old waterproofing paper. (The brown in these images.) The only problem was that the brown paper was put up over wallpaper. Over the years it looks like the wallpaper paste seeped through the paper and onto the brown paper, making one big crumbly, crunchy, swirly mess.

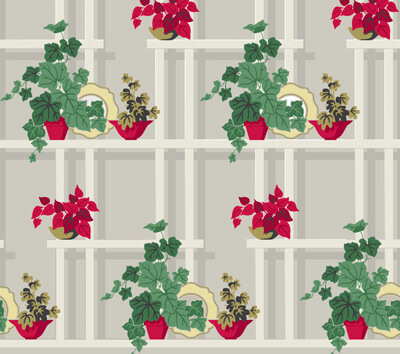
You can see the swirl marks where the wallpaper paste was applied. You can also catch a glimpse of the original wallpaper. Yellow with green flowers and red flowerpots. My best guess is that is circa 1940. Probably looked a lot like this:

Here is a better shot of the paper:
 Nice holes in the wall.
I even found..*PREPARE YOURSELF*:
DRYWALL!!!!
 It appears somewhere in time a section of the wall was removed and a dedicated elictrical circuit was put in for the refrigerator. Instead of patching the plaster (only a fool would attempt that!) they just drywalled half the wall.
SCORE.
But I now realize I have a HUGE project on my hands.
Step 1: Patch the holes where the plaster was completely missing.
I started on the left hand side and worked right. The white areas are my patches. I used a hot mud method to repair the wall. I mixed joint compound to into a thick paste and using a putty knife I filled the holes.
 There are actually more wall holes than there is whole wall.You can also see where the original backsplash/countertop was attached to the wall (the white line of raw plaster) 50 years ago.
At this point I was using mud with a 5 minute working time (patching plaster.) This type of mud is only good for filling holes since you don't have enough time to work with it to make sure you have a smooth finish.
For the cracks and small holes I used joint tape. I really like the self-stick mesh tape, I think it works great. For larger holes I used drywall repair patches (an aluminum base under a self-adhesive mesh.) I didn't want to cut drywall to fit because even the thinnest drywall was too thick since the lathe was still in tact. Feathering out drywall patches would have been a nightmare. Sure the aluminum patches were pricey (about $4 each) but well worth it!
 I got my work cut out for me.
 Step 2: Skim coat entire surface with fresh plaster. Sand and repeat.
After patching the large holes, I added multiple skimcoats of mud with a 90 minute setting time. This gave me a lot more time to work the plaster with my putty knife. The key to a good skim coat is alternating directions when you apply the plaster. First apply vertically, then apply horizontally, and then vertically... etc. This makes it soooo.much.easier!
The actual brand I used was: Sheetrock Easy Sand 5 patching plaster and lightweight setting type 90 joint compound. I preferred it to the premixed because 1) I could control the viscosity by mixing my own and 2) It was at least 5x less expensive than buckets of the pre-mixed and I was going to use A LOT.
 But the huge gaping holes are gone! I had to remove the radiator to get to the wall.
 By the time I had patched the holes, and skim coated the entire wall once, I was seeing light at the end of the tunnel. And after the second skim coat I was finally coming to believe that the wall may actually pass for smooth one day.
 Holy crap? Is the wall actually going to remain standing?
The entire process took me a little over 9 days. With a 90 minute dry time between each layer, and the application of 6-8 coats of plaster along with EXTENSIVE sanding, it isn't something that was exactly speedy. Plus I was juggling doing this when the kids were sleeping or LabDad was home to keep them busy. A pro probably could have done it in less than 3 days, but the wall was in terrible shape. It would have been labor intensive for anyone.
Right now my house is covered in a sea of white plaster dust. I used an entire 50 pound bag of joint compound, as well as 3 additional bags of patching plaster just to complete this first wall.
And to think, this same paneling covers the rest of the kitchen as well. I am in for a lot more plaster repair. Oh yay!
As an interesting aside, I found someone else's memories in my walls:
 A list of names and old telephone extensions. I wonder if Jett J, Guy and Tom M have cell phones if they are alive today? Hmmm. Bet they are the iPhone types.
In any case, the first set of walls are complete.
Cost for this section of the renovation:
Joint Compound: $10
Patching Plaster: $12
Drywall repair patches: $9
TOTAL: $31
Other costs (not included in budget):
Pail (for mixing compound): $3.50
Mudpan: $4
Drywall trowel: $20
Putty Knife: $1
Hepa Filtered Mask (for sanding/demo): $4
(All other supplies (drywall tape, sanding block, demo supplies) I already owned)
Quote for plaster repair: $800/wall
Money Saved by DIY: $736


Post a Comment
Thanks for your comments. I try to get back to anyone with a question.. so please make sure to leave an email address if you want a reply!