s The Kim Six Fix: Kitchen
What is New?
Showing posts with label Kitchen. Show all posts

Organize Your Pantry with DIY Slide-Out Cabinet Shelves

DIY slide out cabinet shelves
If you are a regular reader you probably know by now that I am a Cans Get You Cooking Canbassador, which means I always have a TON of canned foods in my pantry.  Since I’m also a busy mom of three, having a large pantry stash of ready-to-use healthy staples makes my life easier.  But one thing that it does mean is that my pantry cabinet is always a mess!  Cans everywhere!  (A good problem to have, since if I was stocking up on their fresh counterparts, I would be throwing most of them away every week!)

I have shared with you how I organized my upper cabinets, using in expensive photo storage boxes.. And that system works great..in my upper cabinets which are very shallow and at eye level.
On the other hand, where I was running into trouble was my pantry in my base cabinets, specifically the bottom shelf where I keep all the tall and oversized cans.
Pantry full of cans
I literally have to crawl on the floor to see all the way to the back of the 24 inch deep cabinet.  Plus pulling something out from the way back is a nightmare.  It just isn’t a good system. Cant see anything in cabinet

Candy is Dandy But Liquor Is Quicker Cross Stitched Candy Jar

Candy is dandy candy jar
Have you ever walked through a store and have something catch your eye, but you just aren't exactly sure what you need it for?  It happens to me ALL.THE.TIME.  That may be why I have a garage and craft room filled with supplies that would be cool to do something with.. if I just knew what.

Kitchen Herb Garden (Tabletop or Wall Mounted)

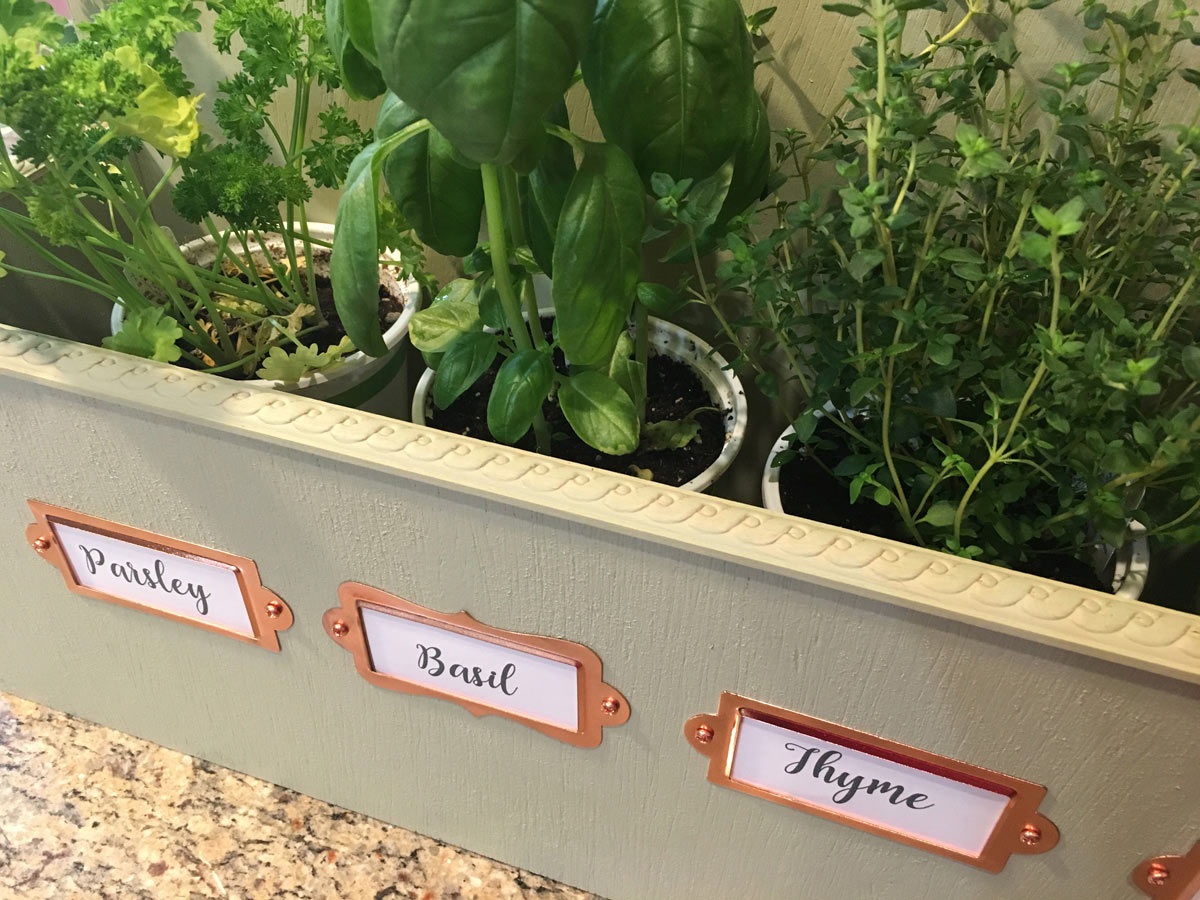
DIY wooden herb garden boxKitchen counter herb garden
Spring is almost here.. sort of.  But even if you are still under snow or suffering from cold temperatures, it is time to start gardening! Even if that means doing it indoors.

So today I want to show you how I made a simple little kitchen herb garden which is perfect either right on the kitchen counter, or even mounted on the wall.
Tabletop herb garden
The premise is simple, grow your fresh herbs right where you are going to use them: the kitchen.  And in this case I made mine to house the most common herbs we use in our cooking.

Organize Kitchen Clutter With Cabinet Corkboards

Corkboard inside cabinet door
Organize all those papers in your kitchen by installing corkboard on the inside of your kitchen cabinets. Now you can find all those coupons and take out menus and they are stored out of sight!
Little stacks of papers are taking over my life! Post it notes, grocery lists, bills to pay, girl scout badge requirements.. the paper never stops.  I do have a pocket calendar that I try to stick all my loose papers in, but things tend to get piled on the counter or stuck on the fridge to make things easier to see at a glance. But I am tired of looking at t-ball schedules and coupons and phone numbers, plus refrigerator magnets were scratching up my stainless steel.  

I knew it was time to cut the clutter! And so when I saw this cupboard door corkboard idea on Pinterest* I knew I had to do it. 

Give plain white dishtowels a new look with a little paint

Hi guys! Meg from Green With Decor here, and I’m excited to be back at The Kim Six Fix today. I have a fun DIY dishtowel project to share today.

I love white kitchens. When we renovated our kitchen a few years ago, we picked white cabinets, white counters and white backsplash. I love it and am still happy with our choices.

Plus it makes it easy to add pops of color to the space without worrying about anything not matching the white counters and cabinets. Big surprise, but most of my pops of color in the kitchen are green!

We needed some new dishtowels and after looking around, I decided to make my own.

Give plain white dishtowels a new look with a little paint. This is so cute, I want to do this for towels in our kitchen!

How to Install A Pencil Tile Backsplash (And What It Costs)

How to Tile a Kitchen Backsplash
Back in 2012 when I madeover my kitchen, one of my favorite parts wasthe pencil tile backsplash.  A lot of people have complimented it when they see my kitchen for the first time, so I wanted to give you some details about it.  It is Golden Select Mediterranean Fusion.  It is made up of Turkish travertine, Spanish marble and glass.  It sells at Costco for $27.99 a box (which contain 5 sheets which are approximately 1 square foot each.)  However, when I was searching for tile during gym remodel they had an $8/box rebate which brought the price down to $19.99 a box or $4/sq foot!  You couldn't beat that price so I snapped up 10 boxes!

Imagine my surprise I saw this article in the Homes section of our paper.  It feels great to be right on trend especially on a tiny budget.  When I picked it out, I knew it was great tile, but I never thought of it as "high design." That makes me giggle.

Removing a Fluorescent Kitchen Light Box

How to Update a Fluorescent Kitchen Box Light
I am pretty sure a large percentage of houses built in the late 80s and early 90s have a large fluorescent fixture in the kitchen.  Back then, they were considered the most efficient way of throwing large amounts of light.   Our house had one, along with the vast majority of houses in our neighborhood:Flurosecent kitchen light boxThe problem is, that now in the 21st century, there are even MORE efficient lighting options available.  Ones that throw much brighter and whiter light, not the yellow (humming) glow of fluorescent tube bulbs.  So when I redid my kitchen, I knew the huge ceiling box had to go.

Replacing a fixture like this is pretty straight forward.  Messy? Yes.  But otherwise it is pretty simple to replace.

15 Fantastic Ways to Upcycle Cheese Graters


15 Fantastic Cheese Grater Upcycles.  You never knew you could repurpose graters this many ways!


Kitchen tools come and go, yet the not much has changed when it comes to cheese graters.  Sure, they may pad the handles, or make them round so they will fit as an attachment on your stand mixer, but really.. at the heart of it, cheese graters have stayed pretty true to their original 1540 design (Yes graters are almost 500 years old!) 

 This article from Culture Magazine article showcases the diversity of this common kitchen utensil. (And if you are a cheese grater aficionado, it is practically cheese shredder porn!)  

So it got me thinking.. we all have cheese graters, and you see them at thrift stores all the time.  They are still affordable, even the old ones.  But what could one do with the beloved cheese grater to give it new life?

Well.. I've collected 15 fantastic ideas (NONE of which have to actually do with grating cheese!) So now if you see a grater at the flea market, you may be inclined to pick it up!

Just wait until you see #15!!

Upgrade to Integrated USB Wall Outlets: It's Easy!

How to replace standard wall outlets with USB charging outlets. A great way to charge USB devices without giving up an outlet.
Earlier this week, I did a periscope broadcast of me replacing one of my standard two socket kitchen counter outlets with new USB integrated outlets.  The kind that have 2 outlets and 2 USB ports although there are lots of great versions on the market.

I know not a ton of people are on Periscope yet (and since those broadcasts only last 24 hours), I decided I would edit that video down and share it here as well:

The Ultimate Guide To Painting Cabinets (Tutorials)

More than 100 different tutorials on how to paint your cabinets.  Sorted by paint type, sanding, priming, and more!  The BEST collection of painting tutorials available today.
Recently my post about how I painted my kitchen cabinets broke the 2 million pageview mark.  And I was reminded that back when I was figuring out the optimal technique for painting my cabinets, that I did research,  A LOT OF RESEARCH,  into how other professionals, bloggers and homeowners painted their cabinets.  It was google search after google search, asking my friends, turning to social media…  I was trying to get as much information as I could and it was a lot of work.  What I really needed at the time was a place to go where all that information was gathered in ONE spot.  With lists of options and links to actual tutorials.  A cheat sheet to cabinet painting.

Organizing the Cans in Your Pantry for less than 50 Cents!

Organizing Cans with Photo BoxesToday I’m going to share an easy hack for organizing all the canned items you have in your pantry.   This post is brought to you on behalf of the Cans Get You Cooking campaign.  As a compensated Canbassador for the program, my goal is to share the benefits of keeping a well stocked (and well organized) ‘cantry’ on hand, in order to make it easier to create creative and easy homemade meals.

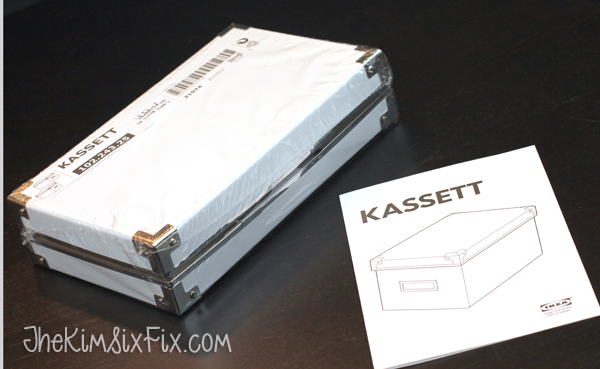
The supplies for this pantry makeover are simple: a couple set of Ikea Photo Boxes (Kassett is the type I used) which cost 99 cents for a set of two!
Ikea Kassett Photo box hackThe boxes are ‘assemble it yourself’ which make them perfect for a quick hack to create can storage racks.

Glass Etching 101

Step by step tutorial on how to etch glass using stencils and etching cream.  SUPER EASY!

I asked on Facebook what kind of project everyone would like to see.  (Therefore if you don’t like this post, and don’t follow me on Facebook you can only blame yourself!  *wink* ) 

The response to my survey was hands down: “Glass Etching”  so I quickly whipped up this project to demonstrate how to use the Silhouette for glass etching. (And I included an alternative to cutting a stencil with your Silhouette if you don’t have one yet! Those directions are in RED**)  

For my sample project I wanted a prettier way of keeping my dish soap on the counter, the idea of a labeled dish soap bottle came to mind.  Obviously, you can etch any glass surface, but a clear glass bottle is a good starter project.
Etched dish soap bottle

Electronics Charging Station Disguised as a Breadbox

It is amazing how fast technology changes, and how much of our lives seems to revolve around being "plugged in" these days.  As a blogger, this is especially true since I never far from my computer, iPad or smartphone in case inspiration strikes, or I want to keep up with what is going on in all my social media channels.

An unforeseen side effect of this 'connectivity' is the fact that my gadgets and gizmos are constantly in need of a charge.  I recently asked on facebook where everyone plugs in their phones.  The top answers seemed to be either 'next to my bed' or 'in the kitchen.'  I fall into that latter category.

In fact, in our house ALL electronics get charged on the kitchen counter.  For multiple reasons: 
1: They are always handy to plug in when we walk in the door and to grab when are leaving.  
2: We often share charging cords and they all need to be in one place. 
3: The counter is high enough to keep them out of the baby's reach
4: We always can find them (a common problem with elementary aged kids)

Between myself, my husband and the kids we have A LOT of electronics:

And because I was tired of everyone sucking up ALL my kitchen outlets, we attached a series of splitters to one outlet in order to keep everything gathered in one place.  The large converters on all the plugs made it nearly impossible to plug everything in at once.  I cringed every time I looked at it..
 

Yes.  It was far from ideal and it was also UGLY.  Here is my beautiful "new" kitchen and one area always looked like a Best Buy had exploded.

I knew I needed to do something and when I saw this tool box charging station by The Happy Housie.  I loved the idea.  I wanted a version that actually disguised the electronics, so they wouldn't seem out of place in a kitchen.

I toyed with lots of ideas.  Different kinds of boxes or baskets.. and then I stumbled upon this at a flea market and I knew I had nailed it.
 
It was a 'vintage' bread box I picked up for $8.  I say vintage, since it isn't really old.  The Kmart price tags were still on it (originally $39.99) but whatever circular thing-a-ma-bob was on the front was now missing.

Cutting Down Horizontal Blinds for a Custom Fit

Pin It

When I tiled my kitchen backsplash, the thickness of the tile made it impossible to lower the previously installed horizontal blinds over the kitchen sink.

For the past year the window has looked like this:
 

Since whenever I wanted to lower them, I end up with this:
 

I Was Featured and You Can Be Too!

This has been a SUPER exciting week for me, to say the least.   I was stoked (wait?! Does anyone actually say stoked anymore?) thrilled to find out a few of my projects were chosen to be finalists at a couple of big contests going on in the DIY Blogosphere.

My Kitchen Update: 6 Months Later & FAQs

Pin It

It has been 6 months since I originally revealed my "80's to Awesome" kitchen makeover and have been fielding dozens of questions about my "new" kitchen, which is by far the most popular post on this blog.  I thought I would take this chance to let you know how everything is holding up, and answers the questions I seem to get over and over.

So, many people want to know how the paint looks, if it is suffering wear and tear or anything like that.  The answer is: FANTASTIC.  Honestly, I don't have a single chip or scratch on any of the painted cabinets.  The finish wipes down beautifully and the only signs of wear and tear have been on the hinges. I actually tried to shoot images of the cabinets today, but they look exactly the same as the "after" photos the day I finished the remodel.

I would do it again in a heartbeat.  I have ZERO complaints about the long term wear and tear or the look of any part of the remodel.

Other FAQ's:
How did you actually PAINT the cabinets? What technique did you use?  
My complete step-by-step cabinet painting tutorial is here.

What wall color is that?  
It is Laura Ashley Gold 3 (by Veldspar: LA709) I actually didn't paint the walls.. it is the color the original owners used. It is a little gold for me, but with my new kitchen I don't mind it.  It looks better now that the cabinets aren't oak.

What cabinet color is that?
Manchester Tan by Benjamin Moore.  It is NOT white, but in fact, cream.  The finish is "Pearl" (a specialty Ben Moore Finish only available in their high end paint lines) and it is NOT sealed with any polyurethane.  It has held up and cleans up beautifully.

How did you keep this entire remodel under $5000 including appliances, fixtures, backsplash, lighting,  countertops etc?
Appliances:
The appliances were a Black Friday deal (back in 2011) The deal was (in addition to a super low BF price) if I bought 3 Bosch Appliances, the store would throw in the mirowave free.. so I bought the dishwasher, fridge and stove. I also got a $500 rebate from Bosch for buying 3 appliances in the same line. The total cost (after the sale and rebate) was $2400 for all four appliances. ($1800 for Fridge, $400 for stove, $200 for dishwasher, and a free Microwave.) I then got an additional rebate for $400 for upgrading from my old non-energy star fridge and dishwasher ($200/each) which made the entire transaction $2000.   Lastly, I sold my old stove on Craigslist for $200, and donated the others to charity, which made my final out of pocket cost: $1800. It pays to shop on black friday!

Lighting: 
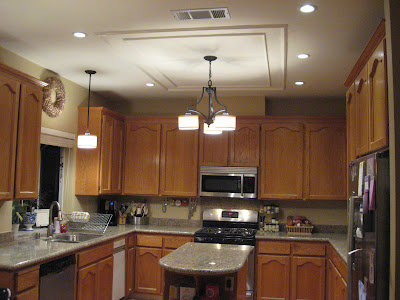
All my lighting fixtures all came off the shelf from Home Depot.  I splurged for LED can/recessed lighting, but I love the result. It was worth the extra 20-30$ per can for the bright pure white light in the small 2 inch cans. The molding on the ceiling if very popular, but it is really there to hide the textured ceiling damage from removing the old box light.  I love it now, it gets TONS of compliments in real life.
 

Plumbing:
The kitchen faucet is Price Pfister, a mid-range faucet and I have been thrilled with it.   I did all the electrical and plumbing work myself which saved me a ton of money. 

Backsplash: 
The pencil tile was a super great deal at Costco.  Once again, I installed it myself (using the Bondera system) and saved a lot of money.

Countertops: 
These were replaced by the previous owner when we purchased the house.  They aren't included in the $5000.  They would have been and additional $2-3000.  Here is what the kitchen looked like the day we moved in (after the tile was gone) and then again after the makeover.  


How big is your kitchen? How wide is that island? Can I fit an island in my tiny kitchen?
My kitchen is 12 feet wide (wall to wall) and the cabinets/fridge extend out about 11 feet (there is exactly 8 feet between the front of the lower cabinets and the front of the fridge door) The island is 2 feet wide by about 4 feet long.  In fact, is just one lower cabinet base box, with a countertop on top and 2 rounded shelves on the exposed end.  It is VERY SMALL, but leaves plenty of space to work around it and I can't imagine the kitchen without it.  

Do you want to come to my house and help me do my kitchen?  (My favorite question!) 

Unfortunately, I am a little busy with a soon-to-be newborn on my hands, BUT never fear! If you would love the look of new kitchen cabinets, but don't want to paint them or even do-it-yourself, Home Depot does offer 3 great options.  I personally LOVE Home Depot, they are my go-to home improvement big-box store and a lot of the supplies I used for my kitchen transformation came from them.  Definitely check them out.

Christmas 2012 Home Tour

Pin It
Since I already posted about my exterior holiday decorations, I thought it was time to give you a little tour of my interior all decked out for Christmas. 

First up: The Formal Living Room
This is the room where we have set up the tree and open our presents on Christmas morning.  My favorite part is the mantle:
 It is done in silver and red, and features lots of great dollar store finds along with a few things I got on clearance at Ikea last year.  The iced silver wreath on the mirror came from Home Goods after christmas last year and was only $8. 
 The kids and I glittered some pine cones for an added sparkle, and the lanterns were on sale after Valentine's day for $5 at Ikea.
All the ornaments came from the dollar store and fill thrift store vases I've been accumulating.
Just off the living room is the Dining Room:

I was able to snag a dozen live poinsettias on Black Friday for 99 cents each and they line the stairs.
The other side of the bannister is swagged with lit greens and features an old set of stockings that came from my husband's family
The more whimsical part of the house is the Family/Play Room:
This room is decorated with all the kid's favorite christmas things: Nutcrackers, gingerbread men and christmas books.   
Our embroidered family stockings hang on this mantle
And the nativity is set up on the side board:
Even the display shelves in the Kitchen got a little Christmas-fied.  

Lastly,  I swagged the top of the kitchen cabinets to unite the space.

It definitely feels like Christmas! I know the kids think so.


Sharing:
 
Copyright © 2017 The Kim Six Fix. Proudly Blogging on Blogger