
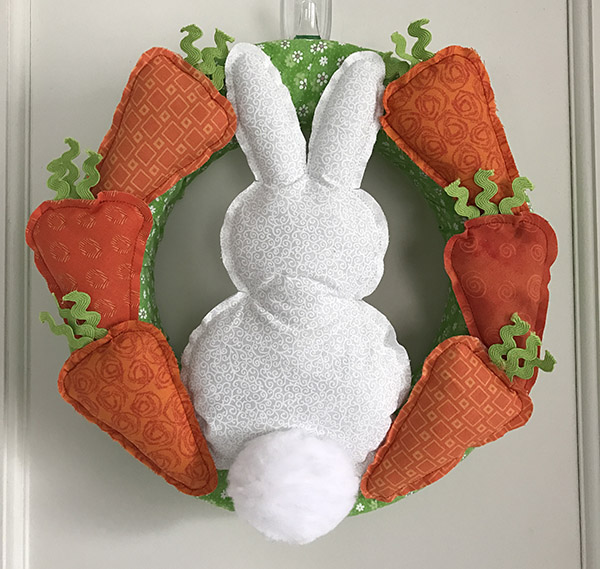
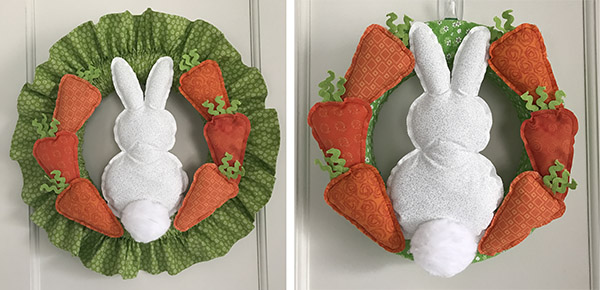
Every year when I pull out my Easter decorations my son accuses me of having an obsession with bunny butts. I've put them on tote bags. I've put them on banners and pillow covers. And now I'm putting them on wreath. I can't help it - those little fluffy tails are just too cute!

When I started experimenting with ideas for this wreath I couldn't decide whether I wanted a ruffled version or a non-ruffled version, so I made both. And I'm sharing directions for both versions so you can make whichever one you like best.
Here's what you'll need for the ruffled wreath:
- A 12" round wreath form
- 3/4 yards of fabric for the ruffle
- A 12" round wreath with a flat top and bottom
- Scrap fabric to wrap the wreath form.
- White fabric scraps (two pieces at least 8-1/2" x 11")
- Orange fabric scraps
- Green 1/2 rickrack
- A 3" pompom for the bunny's tail
- Polyfil stuffing
- A glue gun
- Templates for the bunny and carrots (download the file here)
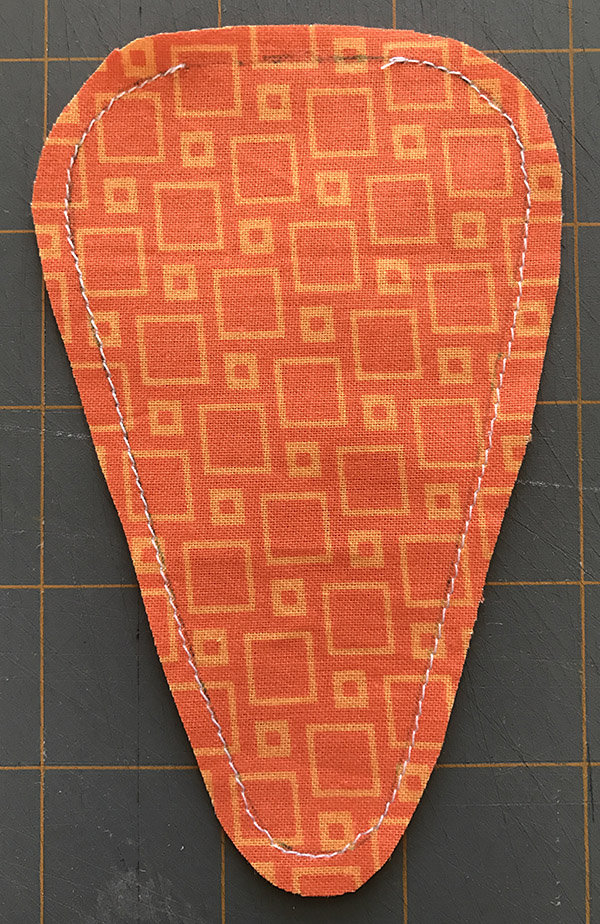
Print out the templates and cut them out. Lay two scraps of orange fabric together, right sides facing, and trace around the carrot template. Don't cut out the fabric shape yet.

Stitch on the traced lines, leaving the center top open so you can stuff the carrot.

Cut around the line/stitching, leaving about 1/4" edge.
Stuff the carrot. You don't want to make it completely round, just stuffed enough to give it a little shape.
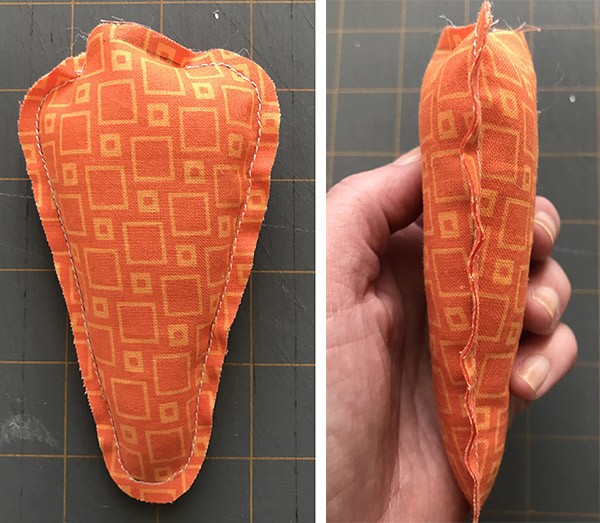
Cut three pieces of rickrack about 2" long and tuck them into the top opening. Sew the carrot top closed, catching the ends of the rickrack in the stitching.
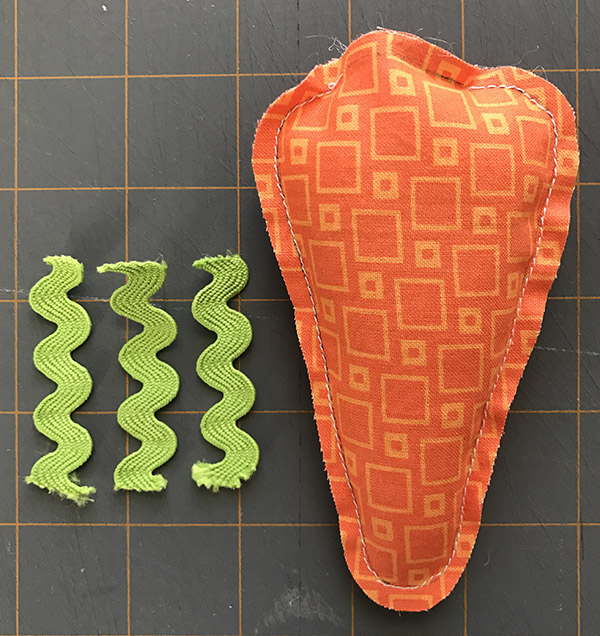
Repeat for as many carrots as you want. I used six for each wreath, but depending on how you arrange them you may wan more or fewer.

Use the same process to stitch and trim the bunny, leaving the middle bottom seam partway open. Stuff the bunny lightly and stitch the bottom closed. If the bunny tends to bend at the neck, you can hotglue a craft stick or a strip of rigid cardboard to the back to hold it straight.

Now for the wreath! For the non-ruffled versions, cut 2" strips of fabric on the bias. (Cutting fabric on the bias gives the strips some stretch, so you can pull them tight and the edges will lie flat around the wreath.)

Wrap the strips around the wreath form, holding them in place with straight pins, until the entire form is covered. Try to place all the pins on the front or back of the wreath where they will be covered by the bunny and carrots.


Arrange the bunny and carrots around the wreath until you're happy with how they look, then hot glue them into place.
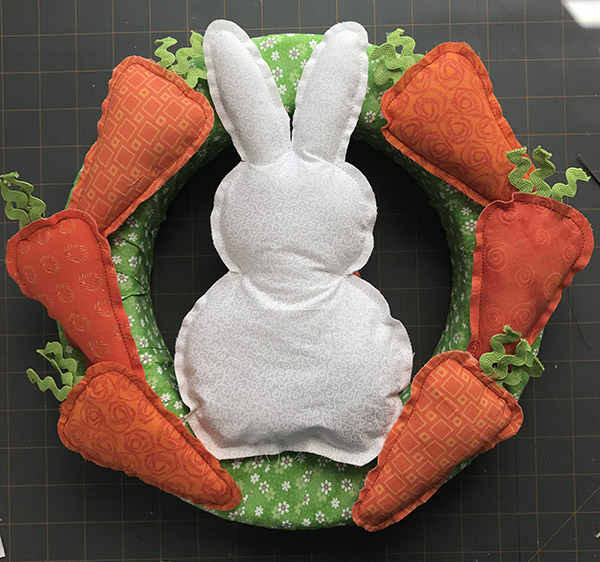
Add the pompom tail, then flip the wreath over and pin a ribbon loop to the top for hanging.

Admire your handiwork!
For the ruffled version, you'll need to start with a few quick measurements. A 12" wreath will have an outside circumference of about 38". To make the ruffle, you'll need to make a fabric tube that is at least twice the circumference of the form. If you're using standard quilting fabric, it should be between 42" and 44" wide, so two strips will make a nice ruffle.
One more measurement to check: Wrap a tape measure around the side of the wreath to determine the circumference, then double this measurement to determine the height of the strips for the ruffle. My wreath form measured just under 6" around, so I rounded up and cut cut two strips 12" high by the width of my fabric.

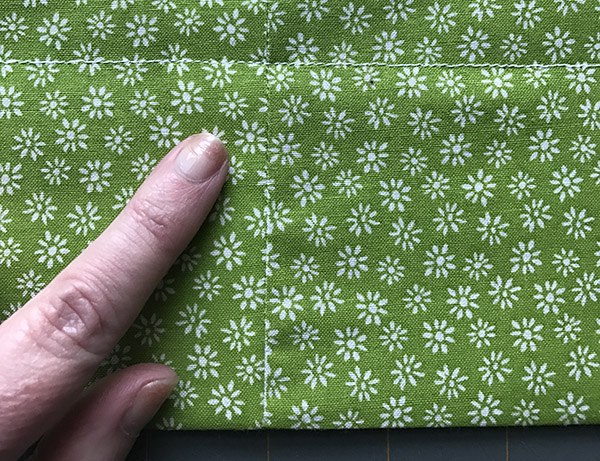
With the right sides together, sew the strips together across one short edge to make one long strip. Press the seam to one side. DON'T press it open or the wreath form will get stuck in it!
Fold the strip in half, right sides together, and sew along the long edge to make one long, narrow tube.
Turn the tube right side out and press it with the seam at one edge, making sure the center seam where you initially joined the two strips is all facing in one direction.. Going back to the measurement of the circumference of the wreath that you took in the last step, divide the measurement in half and add 1/8" to determine how far over to place the seam to make the channel for the wreath form. My wreath for was a little less than 5-3/4", so my calculation came out to 3"

Measure over this distance from the FOLDED edge and stitch a line all the way down the tube. The side of the tube with the fold will become the channel for the wreath form, and the side with the edge seam will be the ruffle.
Use a serrated knife to cut through the wreath form.

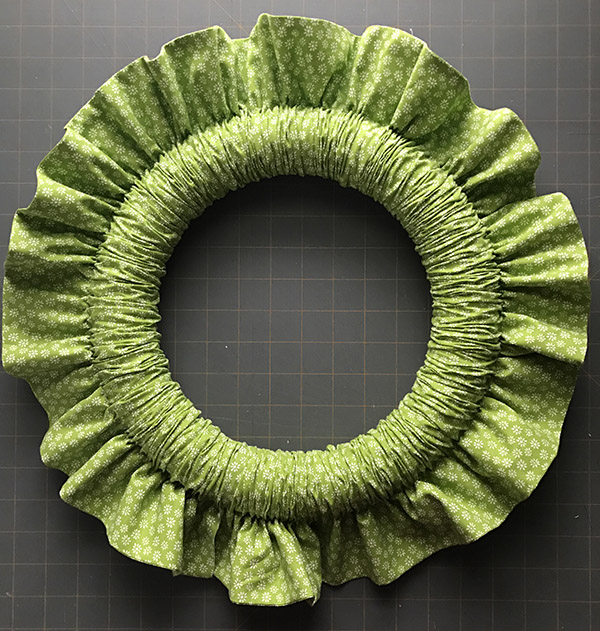
Find the center seam of your tube and determine which side the seam allowance is on. Slide the tube onto the wreath form beginning on the opposite end. In the photo below, my seam allowance was pressed to the left of the seam, so I started sliding the tube onto the wreath form from the right end of the fabric. This kept the wreath form from getting stuck in the seam inside the tube. (Ask me how many wreaths I made before I figured out that trick!)
Slide all the fabric onto the wreath form and work it around until the ruffle is evenly distributed. Hot glue the ends of the wreath form together and slide the fabric ends together to cover the join.
From this point, decorate the wreath and add the hanger the same way described for the non-ruffle version.
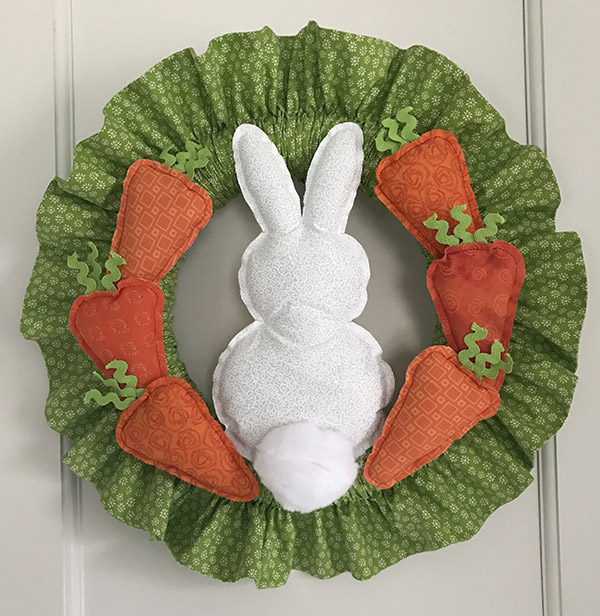
There you have it! Which one do you like better? It's a tossup, but I think the ruffled version was the winner for me. I like that the ruffle makes it a little wider, but the non-ruffled version would be perfect for a narrow door or wall space.


