I love how it turned out, and any individual element would be cute, but combined into a heart is perfection.
Showing posts with label Art. Show all posts
Harry Potter Icons Tote Bag (SVG file)
I love how it turned out, and any individual element would be cute, but combined into a heart is perfection.
20 Beautiful Gold Pineapples for Home Decor
Originally a Victorian symbol of hospitality, the pineapple has recently gotten a glamourous makeover. No longer relegated to pool floats and luau decor, the pineapple is all grown up.
I can’t wait to share 20 fabulous gold guided versions that you may want to welcome into your home!
15 Modern Fall Cross Stitch Patterns
I know cross stitchers never really need an excuse to find new patterns, but IF they did, than the beautiful changes of seasons would be the perfect one! With fall right on the horizon, pumpkin spice lattes are showing up everywhere and I’m feeling really excited about sweater and get-to-skip-shaving-my-legs season!
So what better way to celebrate than gathering up 15 beautiful fall inspired cross stitch pieces. None of these are the traditional farmhouse scene with pumpkins and leaves, but are more modern takes on the Autumn season. Grab your embroidery hoop and some Aida and get started on one of them right now!
How to Transfer Embroidery Designs with A Cricut
By now I’m sure you know a Cricut machine is good for personalizing things, from furniture and cups to shirts and tote bags. You also know it is great for paper crafts and home decor. In fact, this month’s Craft and Create challenge is filled with a huge assortment of home decor ideas for the Cricut:
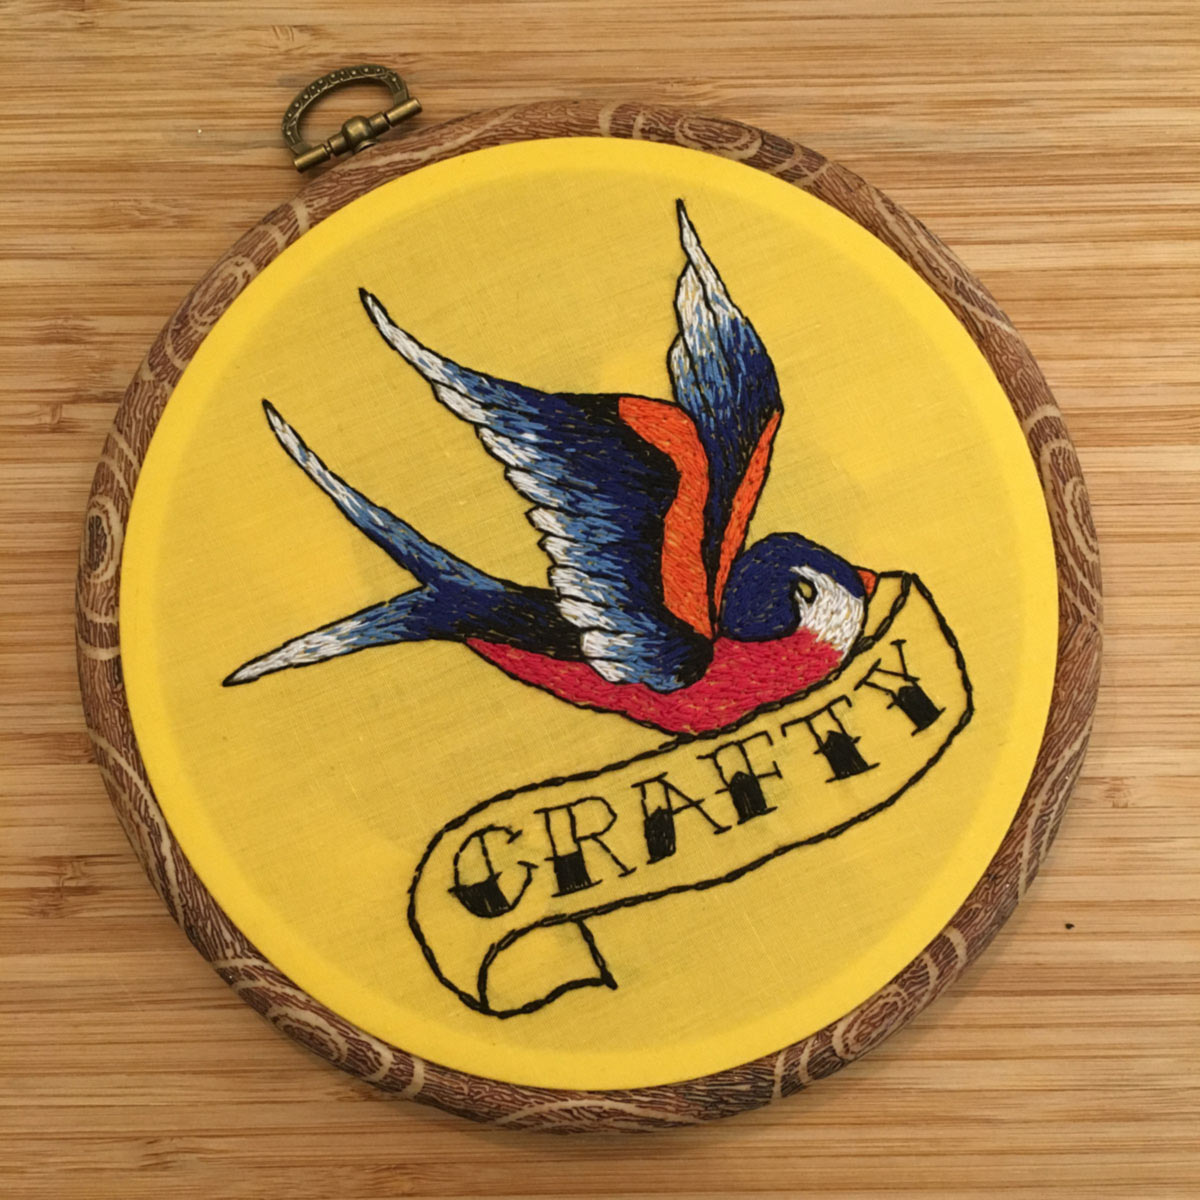
But did you know you Cricut can be handy in the world of HAND EMBROIDERY? Oh yes.. It is like there aren’t many crafts that a Cricut can’t crack. Check out my recent embroidery project, all done with the help of my Cricut Maker!
How to Embroider or Cross Stitch Plywood
It is no secret I’ll fallen into the cross stitch rabbit hole lately. I mean, I even launched my own cross stitch and embroidery shop to share all my latest cross stitch and embroidery patterns and kits. But that doesn’t mean I want to put down the power tools!
Embroidered Plywood:
I have seen people embroidery peg board, and in fact, I even had a painted faux version of that technique:
But I didn’t like how large the stitches had to be, plus the scale of a any finished project would take up a whole wall. I wanted to create my own switchable surface.
How to cross stitch plywood:
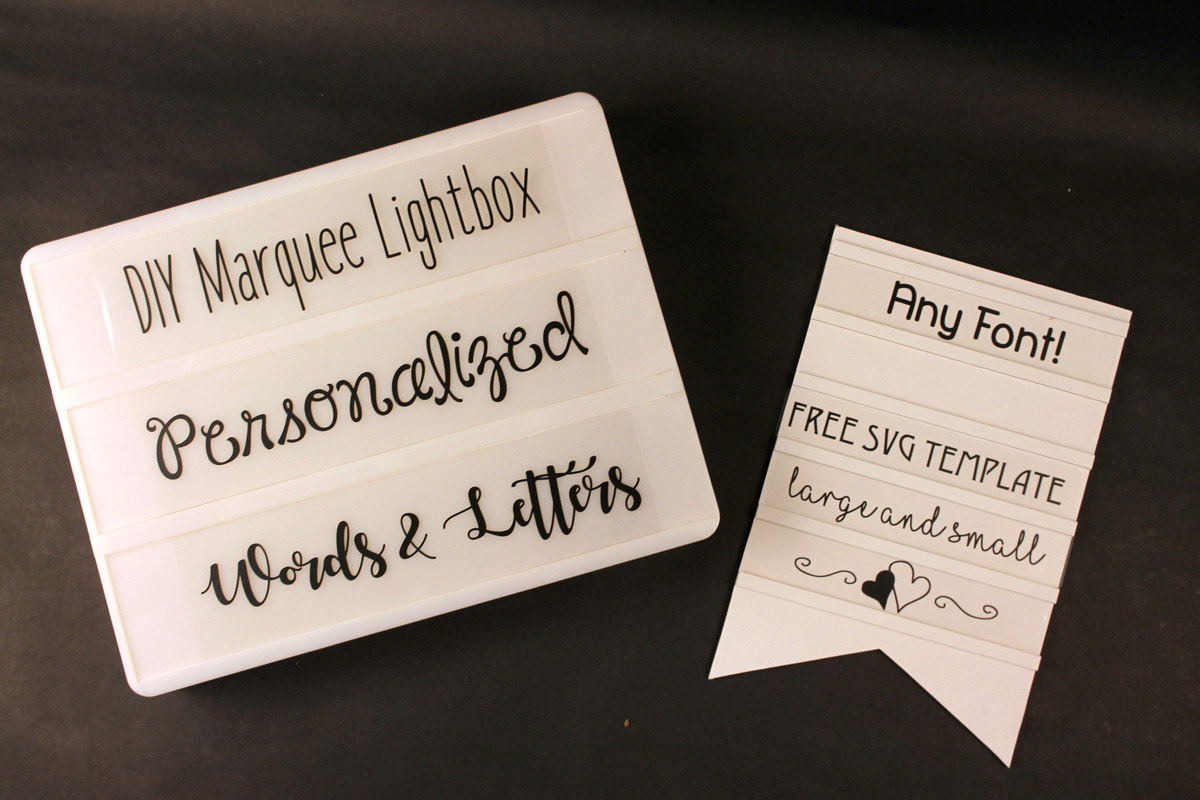
How to Make Your Own Marquee Lightbox Letters and Words
I confess.. I’ve used them.. I love mine! I have a huge collection!
But one of the problems I have is that I don’t always have enough letter (or enough space) to actually say what I want to say.
Let’s just be honest here.. The lovely Heidi Swapp is never going to make a “cuss words” expansion pack! I have A LOT of letter sets, but I still struggle with being able to spell out exactly what I want to say.
100 DIY Wall Art Ideas
One of the most inexpensive and flexible ways to add your personality to your home is with the use of artwork. Wall art doesn’t have to be expensive or even come from a store. There are 100s of amazing DIY wall art ideas that you can make yourself, and today the All Things Creative team is bring you more than 100 DIY wall art ideas.
DIY Floating Acrylic Frames with Perforated Metal Accents
Don’t you love it when a hare-brained idea just happens to work out? You know what I mean: you get that vision in your head and you aren’t sure it is going to work, but when it does, it is AWESOME! Well, that is how I feel about the simple project I’m sharing today: These Plexiglass and Sheet Metal DIY Floating Frames.
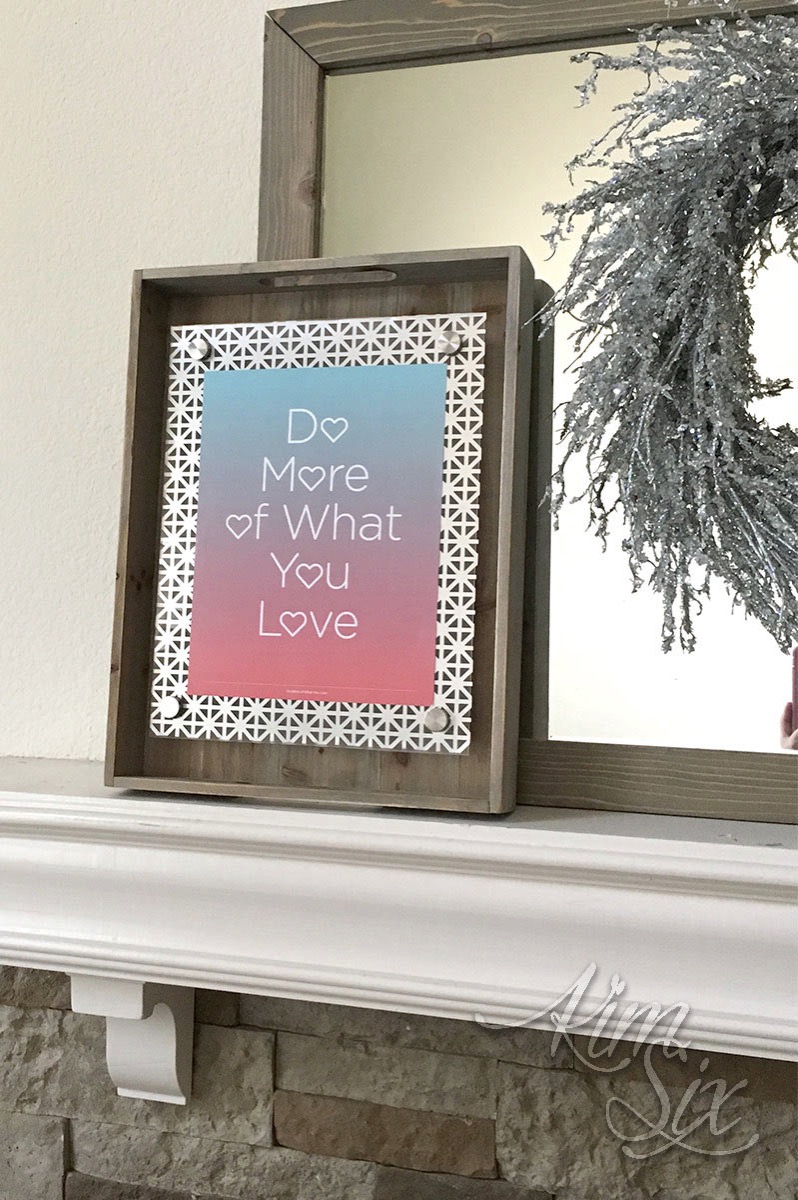
I have always wanted to make some floating frames, but I didn’t want them to be completely transparent, I wanted them to have some sort of detail, and that is exactly what I got by adding a sheet of perforated sheet metal to the mix.
I love that you still get that district “framed” feel to your art, but it is still transparent, so you can see the wall color behind it, and you still get the floating frame vibe.
Of course, a plain sheet metal and plexiglass floating frame is can be quite industrial looking, so to soften it up more for my aesthetic, I mounted one inside of an old wooden mail tray I had, and I suddenly had the perfect yin and yang of industrial and rustic.
And once the frame was mounted inside of the tray, I no longer needed a way to display it. DESKTOP FLOATING FRAMES! I love it! I am pretty sure I’m going to find a home for them in my sewing room.
I am so thrilled with just how great this project turned out, especially for as easy as it was.
DIY Floating Frames Supply List:
- 11x14 Sheet of plexiglass or framing plastic
I purchased anti-glare plaskolite sheets from Home Depot, but there are lots of options available online, including thicker, less flexible plexiglass sheets.
- 30 mm Standoff Hardware
-M-D Perforated Metal Sheets (12x24)M-D Hobby & Craft have a bajillion designs and metal choices. I used the the Aluminum Union Jack pattern for this since it matched the chrome finish of the standoff hardware. The 12 inch sheets are EXACTLY 11 inches wide when you cut off the border, which is perfect for the 11x14 sheet of plexiglass.
-Craft Tin Snips You may also want to wear leather gloves since the cut metal can be sharp.
- Course Sanding Block
- Drill or Drill Press
- 3/8th inch Forstner bit
-Artwork to display (if you need ideas, I have TONS of printables that would be perfect!)
-Wall Mounting hardware
The standoff hardware is designed to be hung on the wall with screws. But I actually hung mine with heavy duty mounting squares so it could be permanent or removable.
Tutorial:
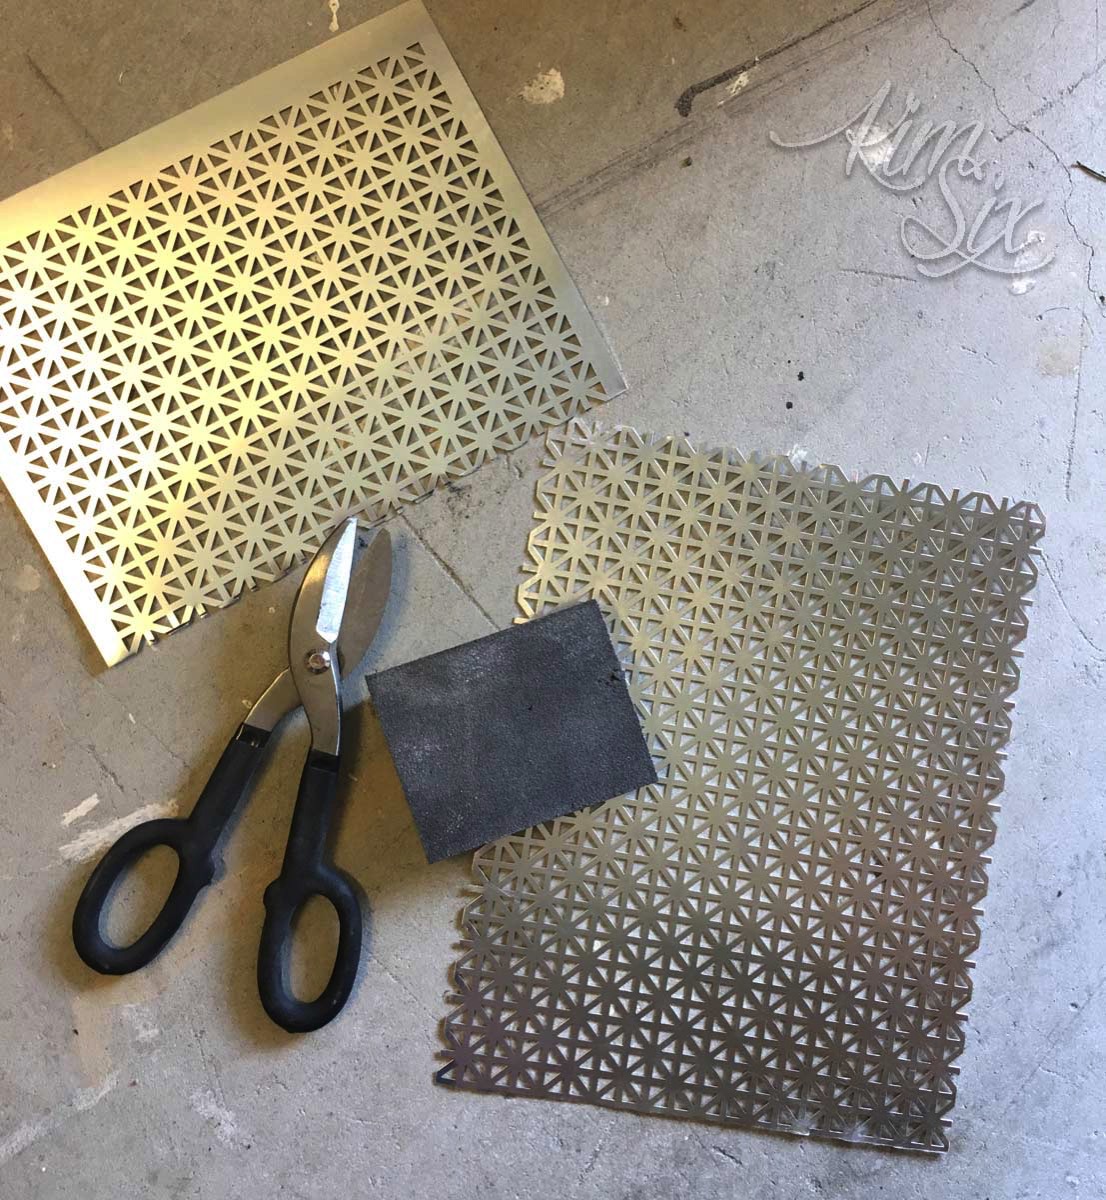
I first cut down the aluminum sheet to the exact size of the 11x14 sheet of plexiglass, and I used my sanding block to smooth off the sharp cut edges. (The aluminum is pretty thin and will bend, so make sure you support the metal on a flat surface and only sand the very edge.)
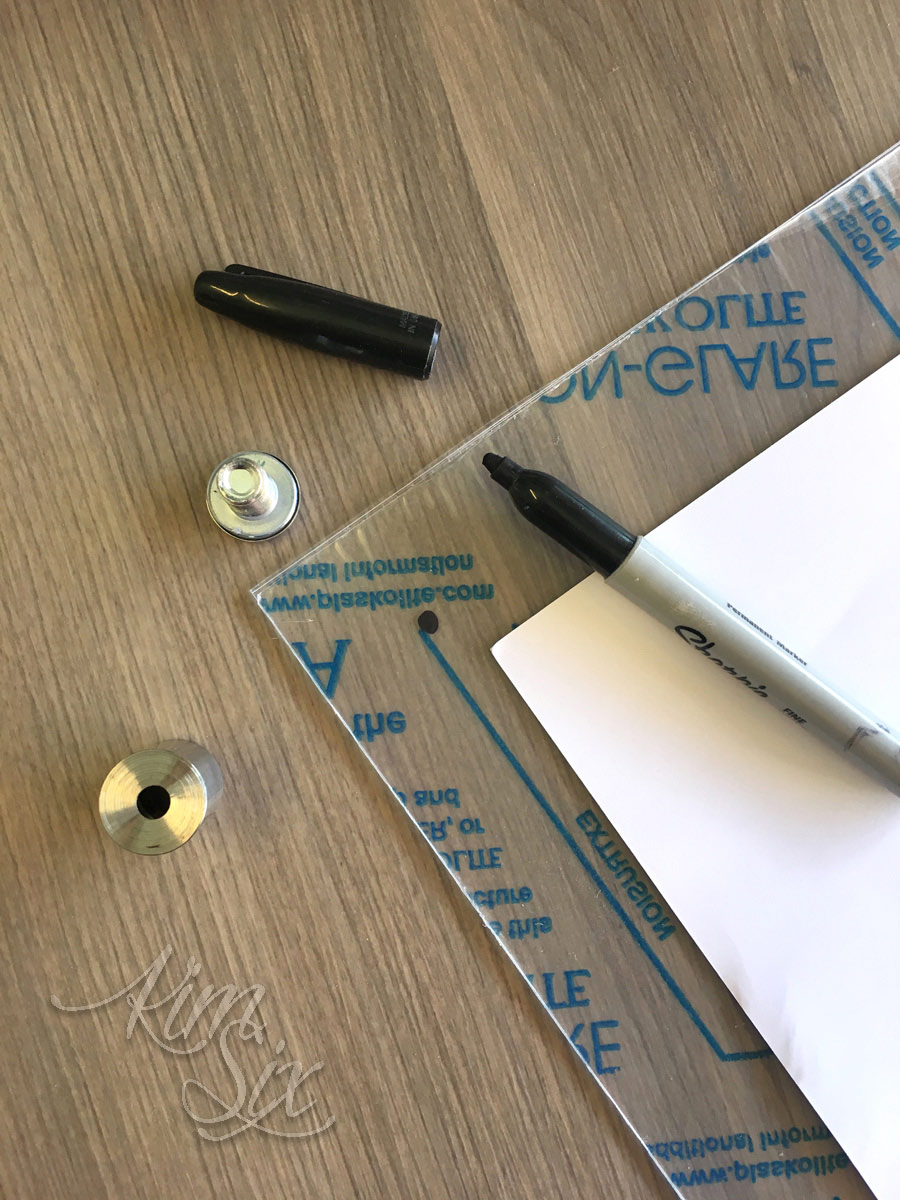
Next I marked where I wanted my four standoffs (the hardware that holds the frame away from the wall) would be placed on my plexiglass sheet (make sure to leave enough room for your artwork in the middle!)
Tip: Don’t remove the protective sheet from the plexiglass until the VERY LAST STEP.
Carefully supporting the plexiglass on a piece of scrap wood (otherwise it will bend and crack) drill through it on your four marks.
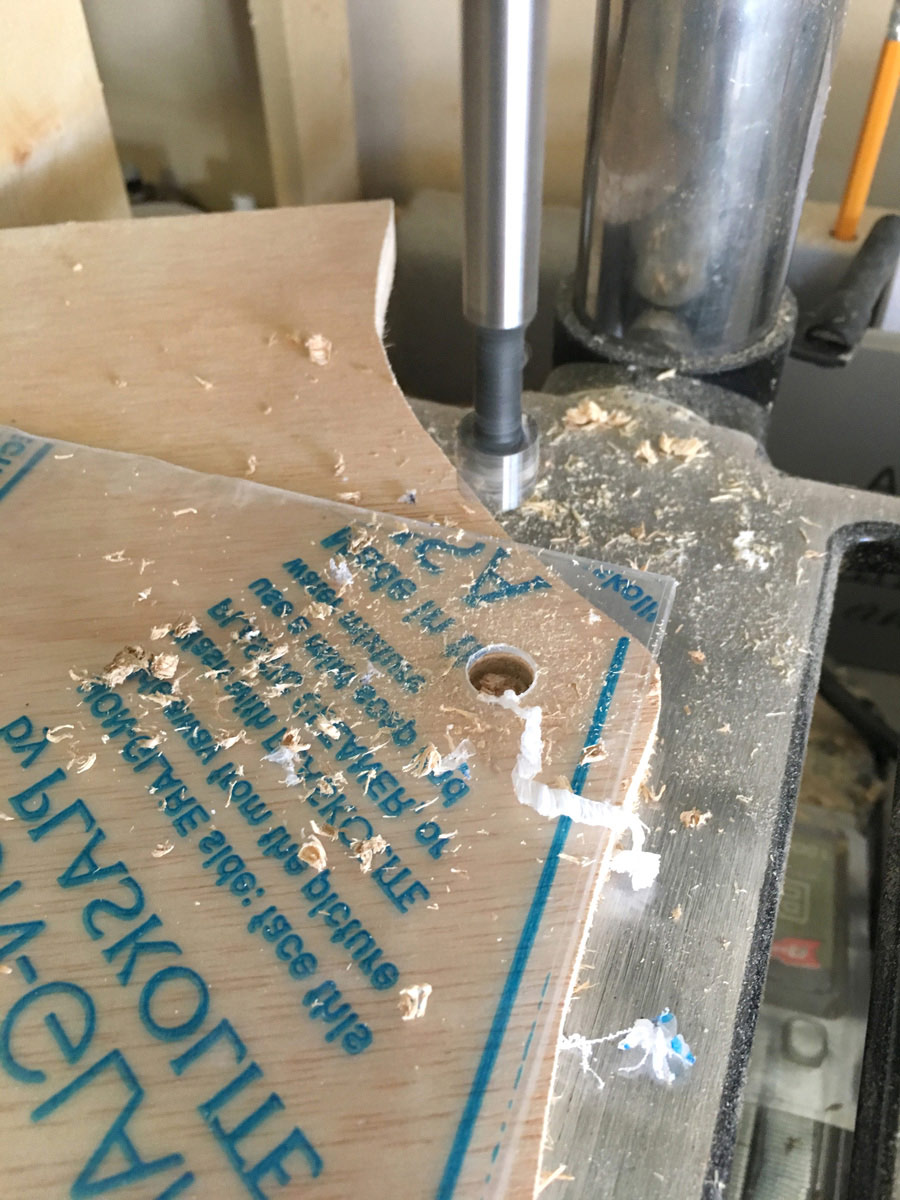
The sheet metal wants to kick out since the drill bit doesn’t catch evenly, so be really careful on this step.
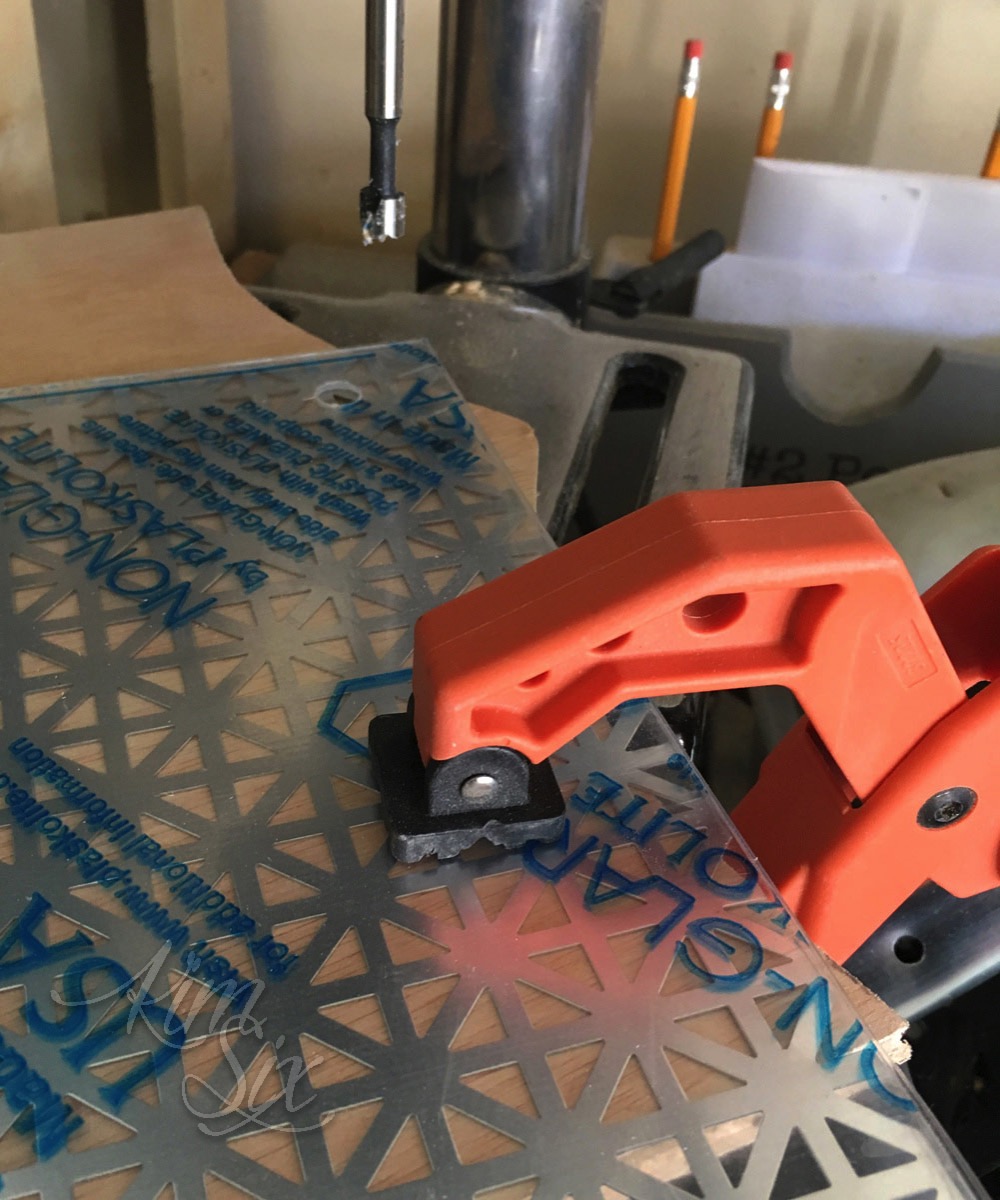
If you are really daring you could sandwich both the metal and plexiglass and drill through them both at the same time.
Luckily if the hole is a little ugly it won’t matter, there is a decent amount of overhand with the mounting hardware to cover up any rough edges.
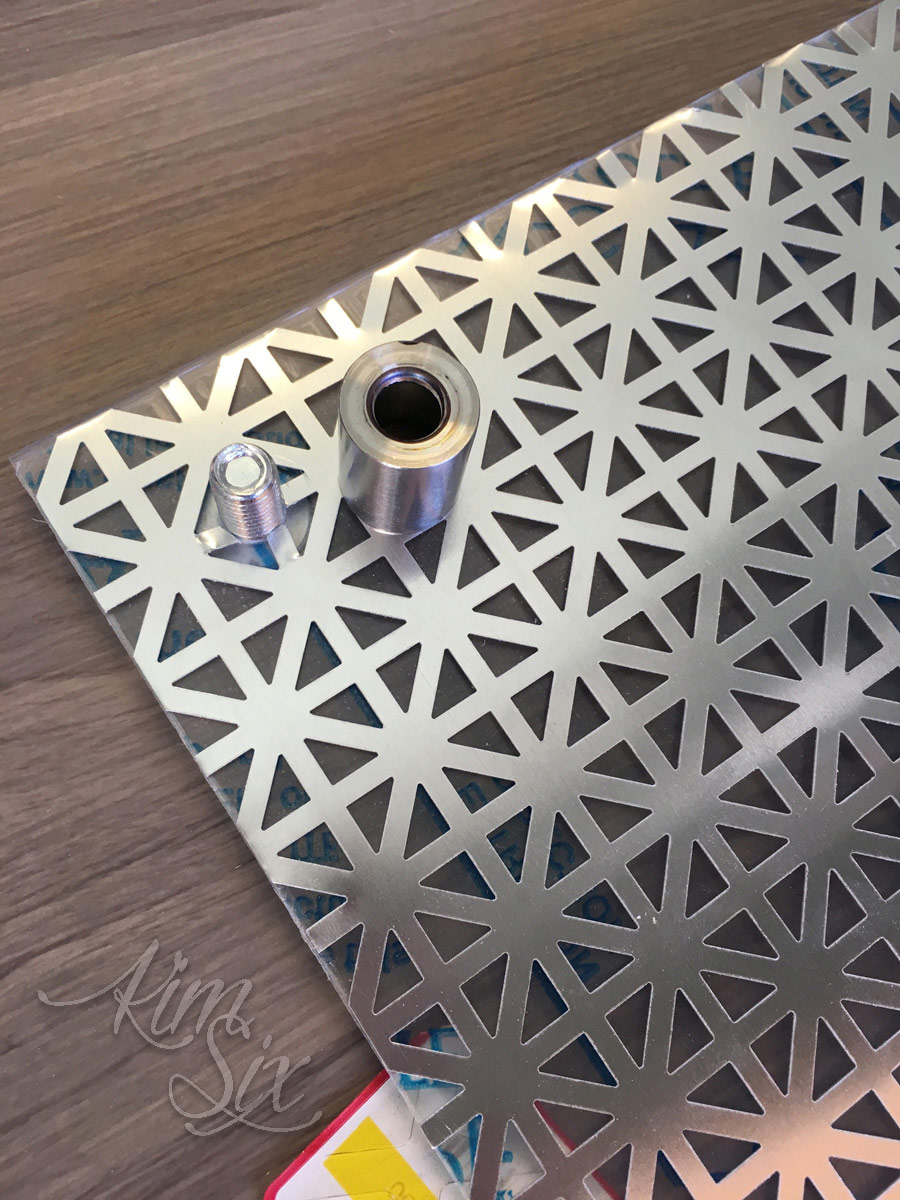
Now it is time to sandwich your metal sheet, your artwork and the plexiglass and then push the screws on the standoffs through.
Tip: If you are mounting on the wall with screws, I would put all the hardware ON your artwork, put them up on the all, mark where each screw will go and then take them apart to attach them. Dont’ try to mount the hardware to the wall first and then line it up with your artwork.
I even tried mounting mine inside a wooden tray, and I loved it so much!
The whole process only took me about 20 minutes and it looks a lot more complicated than that. Don’t you love it when that happens?
This project was part of this month’s Power Tool Challenge, featuring these other amazing bloggers and their projects. Don’t miss THIS COLLECTION OF OTHER FRAMES AND ARTWORK DISPLAY IDEAS:
Create and Babble - How to Make a Magnetic Scrapbook Display
Just the Woods - How to Make a Printable Display for Kids Chore Charts
The DIY Village - DIY Wood Shim Picture Frame
The Kim Six Fix - Acrylic and Perforated Metal Floating Frame
My Repurposed Life - Printable Pallet Frame
Refresh Restyle - How to Make a Photo Display
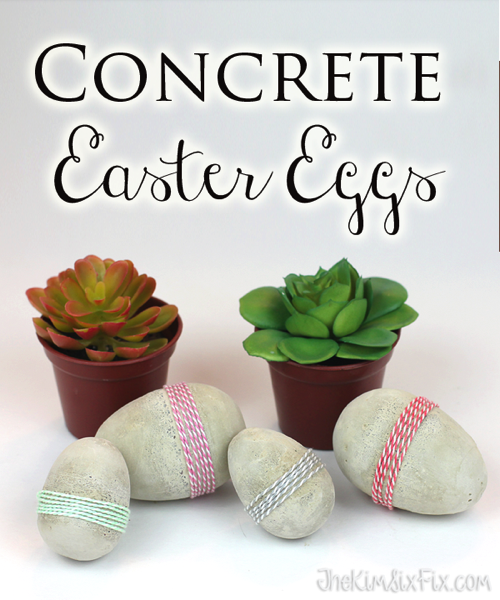
Modern Industrial Concrete Easter Eggs
Ever since getting back from Haven last year I have been slightly obsessed with concrete. There were these guys there from Buddy Rhodes and they did some of the most Ah-Maz-Ing concrete work. They specialized in countertops, but some of their art pieces and furniture were so fantastic I haven’ stopped thinking about it since then.
I have done a little (mostly utilitarian) concrete work of my own, but nothing that was just for the sake of being pretty.
Until today.
Since I have (clearly) been on a plastic Easter Egg kick this week, it would not surprise anyone to know I used the plastic eggs a mold to create concrete easter eggs:
And I am so stoked with how this project came out, that I am definitely going to work with concrete more often. I LOVE it!
The process is a little messy, but really fun. And it goes surprisingly fast.
20 Sarcastic Cross Stitch Patterns (PG, PG-13 and R Rated)
I have been having great time sharing sarcastic and snarky crafts on my Facebook page and some of my favorites have been simple cross stitch patterns.
In order to keep track of all that sarcasm, I put together a list of my favorites, along with links to wear you can buy the patterns. (Some are not actually available for purchase.. but most are.) I have sorted them by JUST HOW OFFENSIVE they probably are. So if you don’t like swear words or other risqué topics, I wouldn’t scroll down!
However, if you have a smart ass sense of humor like I do, I bet you get at least ONE good chuckle from one of these! Check them out!
If you are looking for less offensive embroidery ideas, you may like these projects instead.
We'll Always Have Love and Laundry
They say there are only two sure things in life: Death and Taxes, but I disagree. In our house there are at least two more sure things: Love and Laundry.
If you have children in your household, you know the struggle that is laundry day. It seems as though once you get through one load of laundry, the next is already sitting there waiting to be washed. In our house, the clean clothes don’t make it out of the laundry basket, let alone put away properly.
Turn Kids Artwork into Embroidery Designs
I love encouraging my kids to be creative and make things, which is one of the reasons I have the kids’ artwork gallery wall, to display all their fun artwork.
I recently took the free embroidery class on Craftsy and I wanted to try my hand at a quick project, but instead of using some stock embroidery pattern, I thought it would be fun to use my kids’ artwork.
15 Easy Fall Woodworking Projects
Autumn provides so much inspiration for crafts and decorating, but fall can also be a fun excuse to get out to the woodshop. Fall has so many great motifs, like pumpkins and leaves that can be turned into fast and easy woodworking projects.
I've collected 15 creative and not to difficult projects for the beginning woodworker. This is just the tip of the iceberg when it comes to creative wood projects for fall, but it is great place to start!
Love woodworking projects? Find more HERE!
Easy Autumn Inspired Woodworking Projects:
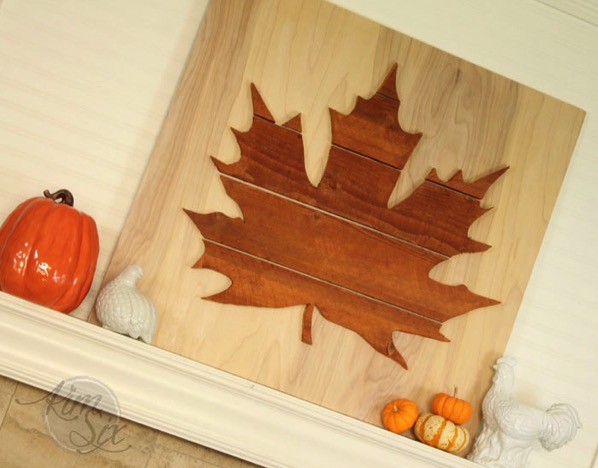
Oversized Maple Leaf Silhouette From Reclaimed Wood
Subscribe to:
Posts
(
Atom
)