s The Kim Six Fix: Search results for rustic
What is New?
Showing posts sorted by relevance for query rustic. Sort by date Show all posts

10 Best Rustic Inspried Projects

10 of the best Rustic Inspired DIY projects from 10 bloggers.  Such a great variety of rustic decor and building ideas for the home

Like it or not, the trend towards rustic and farmhouse style appears to be here to stay.  And using the rustic style as an inspiration for decorating and building ideas is something a lot of bloggers are doing.

So this month, the All Things Creative team decided to feature their absolute favorite rustic style project.   My favorite project is my Rustic X-Leg Wooden Bench out of 2x4s. 

The other 9 ATC bloggers have very different, but equally fantastic projects.. you can see them all below:

Rustic Lodge Inspired Holiday Home Tour

Rustic Lodge Style Holiday Home Tour Rustic and Vintage with a touch of the outdoors I love it
Welcome to part two of my holiday home tour.  Today I’m sharing my family room and kitchen with you.  I took inspiration from that rustic mountain lodge feel of traditional ski chalets and mountain homes. Since it doesn’t really get cold here in California, I wanted the space to remind me of the cool crisp woods up in the mountains. All the rustic elements and natural colors make it feel extra cozy!

Rustic christmas mantel with plaid and red
If you missed the first half of my home tour, it is DRAMATICALLY different than that space which featured traditional Victorian style Christmas decor.


Simple Rustic Winter Front Porch

Rustic front porch with all natural elements for winter
I’m still in the midst of getting my full interior holiday house tour ready for you guys (since you know that requires me to clean my house!), but until then I want to share the exterior this year.  On black Friday I picked up about 100 feet of real cedar garland and so this year I decided to forgo any of the fake plastic stuff (Not that you can’t make the fake stuff look great, but I didn’t want to mix and match with the cedar.)

To play off that gorgeous greenery, I decided to use mainly natural elements in my decorating. For a start I created a pretty vignette by the front door:
Christmas front porch with rustic natural winter elements in reds greens browns
I always struggle with the fact I have a corner front door which and one-sided side light (Oh how I envy those beautiful large symmetric front porches!) But I try to make do.

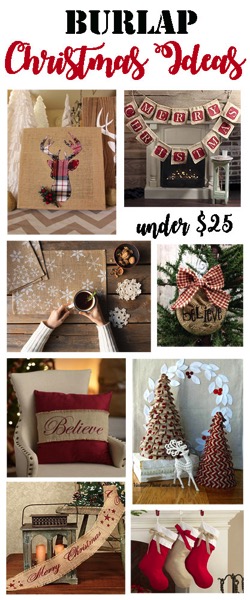
Burlap Christmas Decor for Under $25

Burlap Christmas Ideas Under $25
Christmas is all about the warm embrace of comfort and love. And for me, there isn’t much more comforting that the homey woodsy feel of a rustic style christmas.  A great way to achieve this feeling is with the use of burlap in your decor and accessories.
Burlap for facebook

Affordable, nueutral and easy to work with, I have used burlap in my Christmas decor for many years now, and I love the simple neutral colors and warm rustic feel. 
NewImage
So today I have assembled a mix of burlap DIY projects and inexpensive commercial available decor items that you can use to create the rustic country feeling. 

X-Leg Wooden Bench with Crate Storage for Under $40

Rustic X-Leg Wooden Bench with Built-In Crate Storage made from simple 2x4s and 2x2s.  An EASY DIY project Total cost: Under $40
It has been a while since I’ve tackled a building project and my recent spring backyard cleanup has finally given me the excuse to get back out to the workshop and generate some sawdust.

I needed a storage solution for the backyard, but due the limited space I wanted something that would double as seating.  I couldn’t find anything commercially available that was NOT either:

Painted Thrift Store Ski Makeover

Repurposed Vintage Ski christmas decorI’m really excited to finally share this project with you guys!  I bought these skis way back in MARCH and they have been sitting in my garage the entire year, just waiting to be beautified!

Wooden Shim and Burlap Heart: A DecoArt Project

Wood Shim and Burlap Valentine HeartThings are still in full “Valentine’s Day” mode at our house.  And the decor is slowly rolling out.   So I was excited when DecorArt offered me the chance to team with them** and create a project using a non-traditional surface and Americana Multi-Surface Paint.  This is the project I came up with, inspired by Christina’s intertwined heart made from old chair rail scraps.


I didn’t have any chair rail scraps, but I knew immediately what I wanted to use!  A set of old wooden shims I had leftover from another project.  I love how rough they are, with the knots and imperfections.   I also picked up a wood cut heart to us as the backer and a decorative script ‘Love’ from Michaels.
Wooden shims and paint
I love how in the finished product you can still see all the imperfections in the wood, giving it a rustic ‘reclaimed’ feel:
Reclaimed wood heart
The first thing I did was line up the shims side by side alternating which end was the ‘thick” end and which was thin. Remember that shims are actually tapered to help ‘shim up’ things like cabinets and door frames etc.  So they aren’t flat when you lay them down flat.  I wanted the surface of the heart to be rough, so I got that look by alternating them.

Then I traced around my wooden heart with a ballpoint pen:
Tracing heart shape onto shims
Next I used a coping saw to cut out the heart shape.  You could use a hacksaw if you don’t have a coping saw, but anything larger that that would probably destroy the shims.  They are super thin and want to crack. Cutting shim with coping saw
Once I had all the shims cut, I hot glued them onto the wooden heart and sanded the edges with course sandpaper just to knock down the splinters.  I didn’t sand the flat surfaces since I wanted the texture to show. Sanding wood shim heart
Next I added some American Multi-Surface paint to a styrofoam tray. (I used the Cottonball, Lipstick and Pink Cadillac colors)This was the perfect paint of for the project because it sticks to almost anything! It was great for getting into all the crevices and cracks of the shims.

Like the other supplies for this project, Americana Multi-Surface paint is available in Michaels. Visit the DecoArt Multi-Surface website for more crafting ideas and inspiration. Red pink and white paint
 Because i wanted to let the wood grains and knots show through, I diluted out the paint with a little water.  It worked beautifully:
Painting red pink heart
Next I decided to play off the rustic look by adding  burlap heart (I found that a Michael’s as well) and the Love woodcut (I had painted white.)
Americana painted wood heart
I glued a little piece of twine on the top in case I wanted to hang it, but I decided that I liked it propped up in a vignette much better.
Wooden shim heart
It is so cute and rustic yet fits in well with the rest of my Valentine's stuff.
Burlap wood heart
I think I'm going to incorporate it into this year's mantelscape.  If I ever get around to it!
Rustic painted wood heart

Wooden heart vignette
**This post was sponsored by DecoArt and Michaels.  I received compensation for my time and supplies, but the project ideas, tutorial and opinions are my own.  I was not told what to make, or what to write. 

Brown and Red Rustic Reindeer Mantel

Rustic christmas mantel
As promised, I am sharing my more rustic Christmas mantel.  I normally don’t post on Sundays but there are some HUGE things coming up next week (seriously, come back tomorrow** and check out the awesomeness!) and so I didn’t want to delay getting this post out.

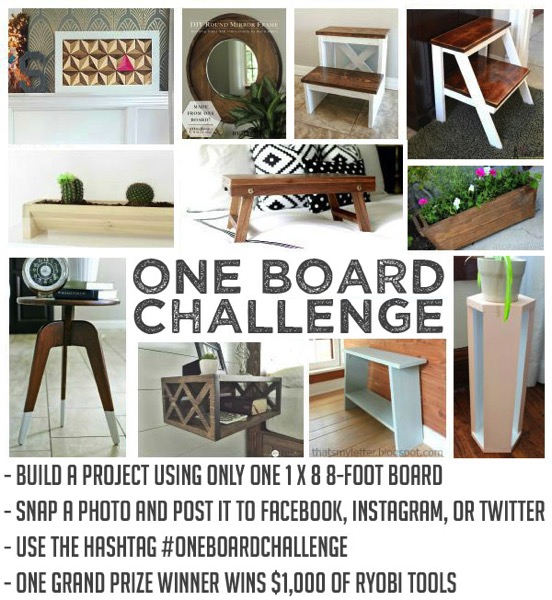
What Can You Make Out Of One Board? Amazing Things!


A few weeks back a bunch of DIY bloggers challenged our readers to see what they could come up with out of a single 8 foot 1x8 board.  At stake?  $1000 in Ryobi tools. 


Well, we asked.. and you guys delivered.  In case you missed the entries (which were all submitted on social media) today I'm sharing everyone's projects.  I am so impressed with the huge variety of builds that were created and I am awe stuck by all the talent and skill you guys have!  

I want to send out a big thank you to Ryobi for sponsoring this challenge and to the following blogs for participating:
Jen Woodhouse (aka "The Mastermind")

I know I speak on behalf of all the bloggers who participated in promoting this challenge when I say "You guys are amazing!"  Thank you so much for participating!

Entries are in random order.  Finalists (nominated by one or more of the bloggers hosting the giveaway) are indicated.  Final winner was decided by random draw from the nominated finalists:

The Best Posts That You Have NEVER Seen

For the past two years I've done round ups from DIY and Home Decor bloggers, featuring their most popular post.  And in those two years I've shared more than 350 amazing projects.

You can see them here: 2014 and 2015
But this year I'm doing something different.

I asked my blogging friends to give me the post from 2016 that they are the most PROUD of, not necessarily their most popular.  This would be the project they love and hold near and dear, but didn’t necessarily get the same love from their readers or on social media.

These won’t be the big projects that have gone viral and you have seen everywhere, but rather the projects you may have missed and really should give a look.

The project I am most proud of this year, but didn't crack my top 10 posts list, was my backyard patio makeover.  I spent countless hours sweating in the sun, painting the pergola, building the screen around the a/c.. even building the seating. 

Before:

After: 

You may have seen it, but maybe not. And I'm not the only one with posts like that.  Every blogger has them!  So I thought I'd give all these fabulous projects a chance to shine with my year end roundup. 
125 of the projects that bloggers have always wanted you to see.  The projects they are most proud of in 2016.. but you probably missed it!

Because there are so many I have broken it down into general categories.  I can’t wait for you to see all the fabulous projects!

Rustic Christmas Tree Wall Art

Hi everyone! Steph at The Silly Pearl here with another crafty tutorial, this time for the holidays. I thought a quick and fun craft would be fitting since it gets so crazy this time of year. Here's how I made my Rustic Christmas Tree Wall Art.

30 Cake Stands I Would Buy Right Now (If I Needed More Cake Stands)

Cake Stands For Any Aesthetic.  Vintage, Rustic, Square, Glass, Round, Feminine.. you name it.  A gorgeous cake plate makes a great versatile decor item.
 So I have a small problem with cake stands.  Like I can’t see one in a thrift shop that I could turn down. I’ve talked about it before on Instagram.  Some women collect shoes, I collect places to hold cake.
Cake stands
But forget just cake!  They are just the most fun way of displaying pretty much anything.  My daughter turned 7 this weekend, I had to whip out my tiny little 6 inch cake stand to go with her tiny little 6 inch cake:
Birthday cake on cakestand
So which Cake Stands would I like to add to my collection next?

Wreath Styling 101

Wreath Styling 101
The traditional evergreen wreath is a universal symbol of the holidays. It is a blank canvas for any decorating style, and with the addition of ribbon and a few floral picks, you can transform it into an endless number of styles and aesthetics.

Today I’m going to share a few simple decorating strategies, as well as give you some examples of how those designs can result in four dramatically different finished wreaths.   Keep in mind that any design could be used with any aesthetic, these are just examples.

The example I am using is a 28 inch pre-lit artificial wreath, but the tips and suggestions included below could be applied to any size wreath, real or artificial.
plain unstyled wreath

DIY Scrap Wood Crate Christmas Tree Stand

Scrap Wood Box Christmas Tree Stand
For Christmas this year I built a wooden crate to hold one of my Christmas Trees.  You also could use it as a planter (I may add a boxwood or something to it after Christmas is over.)

If you aren't a builder but would rather BUY a wooden crate, scroll to the bottom of the post to see where you can find them commercially! 

Christmas tree on reclaimed wood boxRight now it is in the playroom with of my smaller trees, but for a while I had it set up outside on my front patio.  I actually want to make another one for my other trees!
Christmas trees without tree skirts
I also love the weathered driftwood finish.  This is the first time I attempted that and I know I will be using it more often, I love how it came out. Rustic x box christmas tree stand
So how did I build it and stay within the rules of the challenge (no new materials.. only use scraps you already have lying around)?
Well, needless to say, I had a ton of pieces of scrap lumber, since I never throw anything away. .
Random scraps of woodFor me the biggest problem is that they were all random sizes, widths, and even THICKNESSES.  I had 2x4s, 1x3s, 1x5s, old pieces of pallets, some fencing, 2x2s, trim boards and a ton of cull lumber that was in bad shape or warped.
After standing back and studying my stash I realized I had the most length in the left over pieces of tongue and groove boards I used to make my West Elm Inspired Mirror.  I used the “groove” side and cut off more than half the board with the tongue (the large pieces in the photo below).
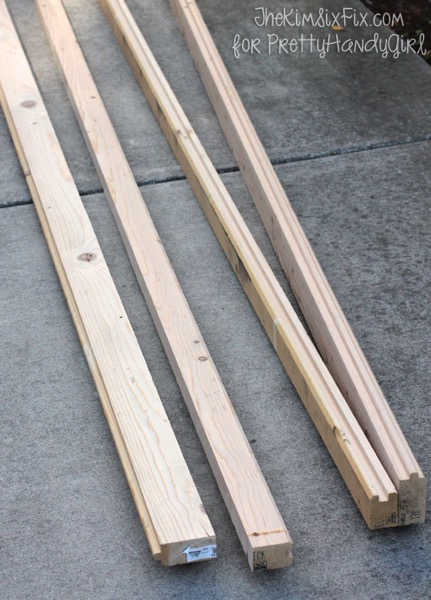
I wanted to reuse those boards but I had to cut the tongue off and make them all a standard width.
Ripping down tongues off boards
Kreg RipCut instead of table sawOnce again I used my Kreg Rip-Cut.  and it worked great.   I was left with “nearly 2x4” boards.  (they were more like 2x3.5)    Because these boards are cut down by hand,  I’m not including measurements for this post.. since none of this is standard lumber. 
Scrap lumber cut down to build box
I didn’t have enough of my ‘2x4s’ to build the whole box, so I had to improvise with some 2x2s on one side.  Scrap lumber box
Next I had to make the inset boards for the flat areas of the box.  I didn’t have enough plywood but I did have LOTS of random boards in various widths.   Enter the pocket hole Jig (in this case the Kreg K4)
Kreg jig for pocket holes
I laid the boards flat on the ground and attached them side by side with pocket holes.  The key was keeping one side FLAT adjacent the floor.. Since the boards were all slightly different thickness the backside of the boards are not level, but that doesn’t matter since it is the inside of the box.  Once I had bunch of boards put together, I snapped a line for the correct total width and ripped it down with the Rip Cut. Connecting 1x4 boards with pocket holes
Next I had to insert the panels into the frames.  I used blocks to make sure the overhang of the frame was exactly the same for all the boards.  Since some of the boards were warped and different thicknesses, once again, it only mattered what they looked like from the outside.. Using blocks to level boards
So you can see the inside is kinda a mess of random boards. Ah yes.. the beauty of working with junky scrap lumber. Using pocket holes to build boxI assembled the final box and then it was time to trim it out.  (The box has no bottom or no top.. I may convert it to a planter later so I didn’t think it needed a bottom)Building a wooden crate as a christmas tree stand alternative
Since (per the challenge) I couldn’t buy trim for the outside, I used some old shims I had leftover from my valentine’s day heart I made last year.  They weren’t long enough to go end to end so I had to butt them up end to end and then cut the corners off with a box cutter.  Because they are shims they are tapered, so I always had the thick end in the center of the X and cut off the thinner end.  Cutting shims for cross bracing
I used glue and finishing staples to hold them on. Using shims to create x shape on box
And here is the finished box.  I didn’t want it to be raw wood so I used a sample of “Driftwood Weathering Finish” I received at a blog conference.   Wooden crate with cross braces
That stuff is really cool.   You just add the powder to water and then paint it on your piece.  It gives a different result depending on the wood type (you can see the one dark redwood boards on the left side of the box in this photo) I loved how it looked old and sunbleached.  Like this was really an old crate.
Rustic x box christmas tree stand
So.. how did I get the tree to stand up in the box?  Well.. I couldn’t use the stand that came with the tree.. I had to create a smaller one.  For that I used a small trick or treat bucket and a length of PVC pipe I had leftover from the DIY Soccer Goal.  I first taped the bottom of the pipe so no concrete would get inside.
Embedding PVC in bucketThen I mixed up some mortar mix and inserted the pipe into the center.
Mixing concreteLet it dry a few hours and cut the pipe down with a pipe cutter or hacksaw.
PVC pipe in concrete post stand
I put it in the center of the box (I had to prop it on top of a paint can to be high enough)
Concrete tree stand inside box
And I added my tree.
Vintage crate tree stand
You guys.. I just love this so much!  I may use it on my real full size tree next year.  (this is my space saving smaller tree that goes in the kids’ playroom) because it came out so much better than I thought it would.  I’m so glad Sandra challenged us to this! Burlap and berry rustic tree


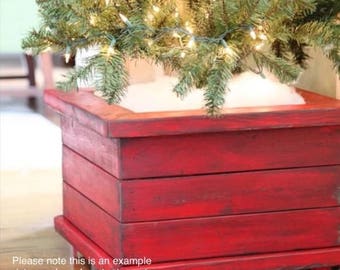
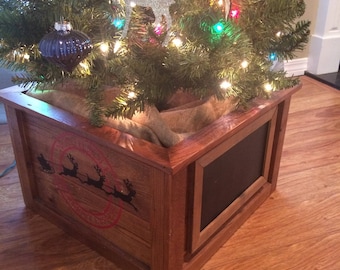
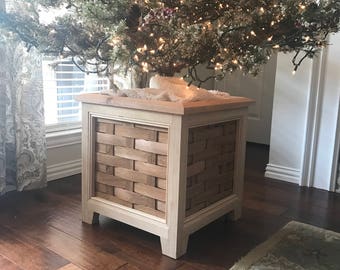
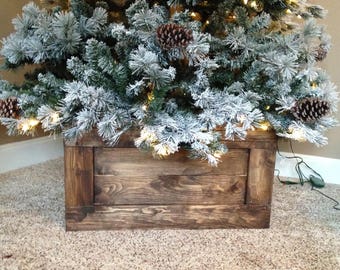
Commercially Available Christmas Tree Boxes:

ETSY: Click on any image to go to the listing


Balsam Hill:


A cottage in the city: 


Now it is time to share your projects, or see the other bloggers who stepped up the sCrap wood challenge.

Here are the details for the sCrap Wood Challenge: Anyone who want to participate is welcome to join. If you blog, you can link up below.

 If you don’t blog, share your project on Instagram, Facebook or Twitter and use #scrapwoodchallenge and tag @SawdustGirl so she can see what you made and maybe feature you!

Rules: No new lumber can be purchased, it must come from your scrap wood pile or some free wood you found on the side of the road.
You may use new fasteners, glue, paint, stain or whatever finish you want.
This is a building challenge, so no refinishing projects. Sorry.

This is a “Just for Fun” challenge to use up some of those scraps.  There is no judging and no prize other than your own satisfaction for a job well done! (And hopefully a smaller scrap pile.)

The link up will close next Monday (Nov 29th) so you don't have much time..

 
Copyright © 2017 The Kim Six Fix. Proudly Blogging on Blogger