
I’m so excited and thrilled to be included in this month’s Power Tool Challenge. Every month a group of talented tool loving bloggers get together and create simple projects anyone can build, in order to encourage people to overcome their fear of power tools. (I have already put together a list of my personal power tools as well as their reviews.) 
The other participants in this month's challenge:
DIY Shutters Create And Babble
DIY Fireplace Mantel Shelf Her Tool Belt
Industrial Paper Towel Holder by Virginia Seweet Pea
Blanket Ladder by Refresh Restyle
Cedar Hose Planter by Kim Six Fix
DIY Vanity Sliding Drawer by Interior Frugalista
How To Patch A Hole In Drywall by Designs By Studio C
Wall Mount Staghorn Fern by A Piece Of Rainbow
DIY Painted Stairs Makeover by Thrift Diving
DIY Modern Rustic Mirror by H2OBungalow
The theme this month happened to be “Home Improvement” and so since spring is right around the corner I decided to build a planter for my front yard, that would also double as hidden storage for my garden hose:

And even if you don’t like or need the project, you have to admit, I have a pretty cute assistant/model:
 This was a ‘custom’ build (meaning I only had this exact amount of room between some bushes were my box would fit, so I haven’t written up detailed plans for cut lists, since I am not sure anyone would want to build it the same size as mine, but I’ll give you a general overview of how I put it together.
I only needed three types of lumber:
2x2s for the box
Cedar fence boards for the sides and door (these are great since they are super cheap!)
1x3s for the top trim
In my case I build the box to be 18x18 (which fit between the house and the walkway and between the two shrubs).

I built the box from 2x2s using pocket holes. So my power tool of choice was a drill and a Kreg Jig (I personally use the K4 system but I also have worked with the R3 which is a simple jig if you are just starting out)

You also will want to invest in a Kreg right angle clamp (or two) if you are doing any projects with lots of pocket holes. It makes it a lot easier to hold the pieces to gather.
 I used two holes in every joint, mostly to keep the boards from twisting.
 This is what the final box looked like. 18x18 by 16 inches tall.
Next I added 2 more 2x2 supports about 8 inches from the bottom and then made a shelf out of the cedar fence boards, cut down to 18 inches. This is the false bottom of the planter that will hold the plants and soil up.
 Since the boards weren't the exact correct width, I cut them down with my Jig Saw (another great DIY power tool.)
  I attached the boards to both the shelf with a pneumatic nail gun and then I made sure to test my design to make sure the hose would fit (which it did)
 Next I added the cedar boards to the sides. I also added one board to the top of the front and the back. I left the bottom rows off of the back side of the box in order to feed the hose from the spigot and into the box. I left the front rows off the front side in order to create the swinging door to access the hose.
To build the door I just used Simpson Strong-Tie strap ties in a “z” shape to hold the boards together. (I wasn’t going to trust pocket holes) If you are worried about wear and tear, or the straps bending, you could use heavy duty ones, but I just used the lighter 20 gauge ties.

For the door itself I used some cheap 3 inch tee hinges and a pull handle.

I did use screws to reinforce the top board on the front (the one that supported the hinges) since I didn’t want it to loosen up. I also added some trim boards to the top of the box that I mitered, in order to give the top a finished look.  Finally I stained it with Behr’s exterior Weatherproofing Stain and sealer (since I knew it would be getting sprayed by the sprinklers all the time and I didn’t want it to rot). To bring out the red of the cedar I used the “Cedar Naturaltone” color.
Finally, I added heavy duty plastic to the planter part of the crate. This was to help hold the moisture into the soil and keep water from getting though the boards and dripping onto the hose. I have used this method before with a bunch of other planters and it has held up really well. To attach the plastic without huge holes I used my Arrow T50 Stapler and it made quick work of it. I love that my hose is no longer in plain sight in the front yard.
 And the planter will be great to add color along the front walk.
 This entire project took me two days and cost a little under $25.
  And I couldn’t have done it with out my power tools!
  If you are looking for more planter inspiration, you can also see these posts:
Finally I stained it with Behr’s exterior Weatherproofing Stain and sealer (since I knew it would be getting sprayed by the sprinklers all the time and I didn’t want it to rot). To bring out the red of the cedar I used the “Cedar Naturaltone” color. Finally, I added heavy duty plastic to the planter part of the crate. This was to help hold the moisture into the soil and keep water from getting though the boards and dripping onto the hose. I have used this method before with a bunch of other planters and it has held up really well. To attach the plastic without huge holes I used my Arrow T50 Stapler and it made quick work of it.
I love that my hose is no longer in plain sight in the front yard.And the planter will be great to add color along the front walk.This entire project took me two days and cost a little under $25. And I couldn’t have done it with out my power tools! If you are looking for more planter inspiration, you can also see these posts: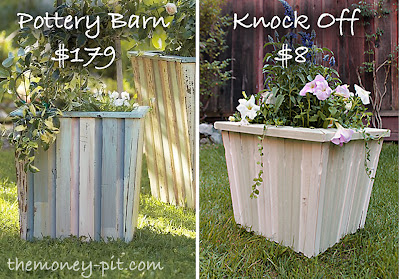


