
Hi everyone! It's Pam from Clever Little Mouse with a tutorial for two easy zipper pouches that will help you get over your fear of sewing zippers.
Every time I show a project that uses zippers, I get at least one comment from someone who thinks working with zippers is too hard, too scary, too complicated....you get the idea. I promise, if you can sew a straight line, you can make these pouches!

If you're really new at sewing, the pencil pouch is a little simpler but both of these are very beginner friendly. The assembly instructions are basically the same, with just one extra set of seams for the makeup pouch. I made both pouches at once so you'll see photos for both throughout the tutorials. Ready? Let's get started!
I made my pouches from scraps left over from another project. The black and white fabric is meant to be colored with fabric markers. Since the markers come in very bright colors, I used bright zippers and lining fabrics just for fun.
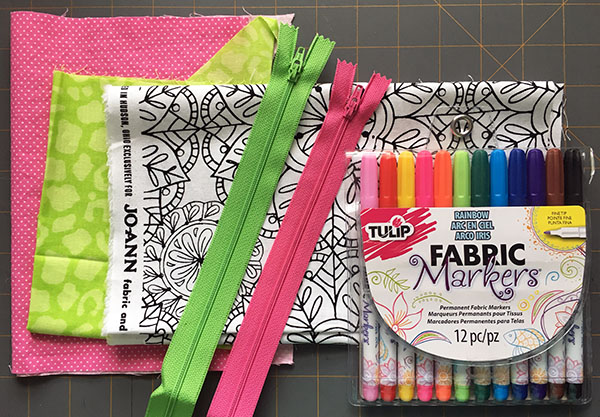
You'll need a 9" zipper for each pouch.
For the pencil pouch, you'll need a 9" x 8" scrap of fabric for the outer bag, a 9" x 8" scrap for the lining, and a 9" x 8" scrap of lightweight interfacing to give the bag some structure. (I used Pellon 911 Fusible Featherweight interfacing. You can skip this step, but your bags will be floppy.)
For the makeup pouch, you'll need a fat quarter of fabric for the outer bag, a fat quarter of fabric for the lining, and an 11"x 15" pice of interfacing. You'll also need the bag pattern, available here. Print the pattern out at 100%. You'll notice this pattern isn't just a square. The angled side seams mean the finished bag will be the same width at the top and bottom, instead of wider at the top like most boxed bottom bags. It's still very easy to sew.
Time to cut out the bags!
For the pencil pouch, cut two pieces 9" x 4" from each of the fabrics and the interfacing, plus two pieces 1-1/2" x 2-1/2" for the zipper tabs. (You can cut these from either the outer fabric or the lining.)
For the makeup pouch, cut two pieces from the outer fabric, lining fabric and interfacing using the printed pattern, plus two pieces 1-1/2" x 2-1/2" for the zipper tabs.
Assembly instructions are the same for the next several steps.
1. Fold the zipper tab pieces in half, wrong sides facing, matching the short ends and press to mark a center line. Unfold the tabs, fold both ends into the center line and press again, then fold the piece back up along the original center line.

2. Starting at the top of the zipper, lay one of the folded tabs right up against the metal stopper at the end of the zipper teeth. Trim off any excess zipper tape that extends beyond the tab.

3. With the trimmed ends of the zipper tape inside the tab, fold the fabric down and stitch close to the edge to secure the tab.

4. Trim the zipper to size. Measuring from the edge of the tab you just created, trim the zipper to 8" long for the pencil pouch. For the makeup pouch, trim the zipper to 6" long.

5. Fold the other zipper tab around the raw end of the zipper and stitch it down.

6. Trim the sides of the zipper tabs so they're even with the sides of the zipper.

7. If you're using interfacing, now's the time to iron it to the wrong side of the outer bag fabric following the manufacturer's instructions.
8. Lay an outer bag piece on your work surface, right side up, and center the zipper along the top edge, right side down. Your outer bag fabric should extend 1/2" beyond both ends of the zipper.

9. Layer a lining piece on top with the right side of the lining fabric facing the right side of the outer bag fabric, with the zipper sandwiched in between. Pin in place and sew along the top edge with a 1/4" seam.
10. Turn the pieces so the wrong sides of the fabric are facing each other and the zipper sticks out from the seam. Press the seams and topstitch along the zipper.

11. Repeat the same steps for the remaining outer fabric and lining fabric on the other side of the zipper.

12. Refold the pieces and pin them together so the two outer bag pieces are together on one side, right sides facing, and the lining pieces are on the other side (also right sides facing).


When you get to the seams along the zipper tabs, you'll need to pinch the zipper tabs in between the fabrics to get the side seams to match. Make sure the zipper is unzipped at least halfway before you proceed, or you won't be able to turn the finished bags right side out!

Here's where the instructions begin to differ a bit. Instructions for the pencil pouch come first; for the makeup pouch, skip down to step #17.
13. Sew all the way around the outer edges of the pencil pouch with a 1/2" seam, leaving a 3" gap at the center bottom of the lining. (In the photo above, the two red pins are pointing to the space where I left the opening.) When you get to the zipper tabs, you should be sewing right along the edge of them but NOT catching the tab fabric in the seams. This will make the tabs lay nice and flat when the bag is finished.
14. To minimize bulk, trim across all four corners close to the stitching.

15. Turn the pouch right side out through the opening, then stitch the opening shut.

16. Push the lining down into the pouch and give the whole thing a quick press. Done! Isn't it cute??


On to the makeup pouch!
17. Sew the sides, top and bottom of the bag with a 1/2" seam as shown by the red lines below, leaving a 3" gap in the bottom of the lining for turning. Same as the pencil bag, you want to sew right along the zipper tabs without catching them in the side seams.

18. With the bag still inside out, pull the corners apart at the notches until you can line up the side seams and bottom seams, right sides facing, at all four corners.

19. Pin the corners together, then sew across each one with a 1/2" seam.


20. Turn the bag right side out through the opening in the lining, then stitch the opening closed. Tuck the lining down into the pouch.
Bag #2, all done!

I love the coloring fabric for these. I found it at my local Joann's store, but you can search online for some other fun options. I'm planning to package these two pouches with a set of fabric markers as a gift for my niece. They come together so quickly that you could make several sets before the holidays, and conquer your fear of zippers in the process.
Looking for more things to make with coloring fabric? Check out my throw pillow tutorial!


