
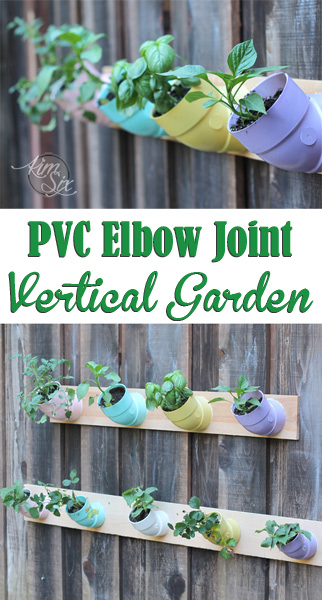
 You may already know that my house has pretty much ZERO yard space. I’ve written about the trials and tribulations of a small yard, combined with living through the California drought and so it may come as no surprise that when I wanted to plant a spring garden this year, i had to do a little bit of thinking outside the box.
Showing posts with label Plumbing. Show all posts
Showing posts with label Plumbing. Show all posts
PVC Pipe Vertical Garden
You may already know that my house has pretty much ZERO yard space. I’ve written about the trials and tribulations of a small yard, combined with living through the California drought and so it may come as no surprise that when I wanted to plant a spring garden this year, i had to do a little bit of thinking outside the box.How to Know When To Replace Your HVAC System
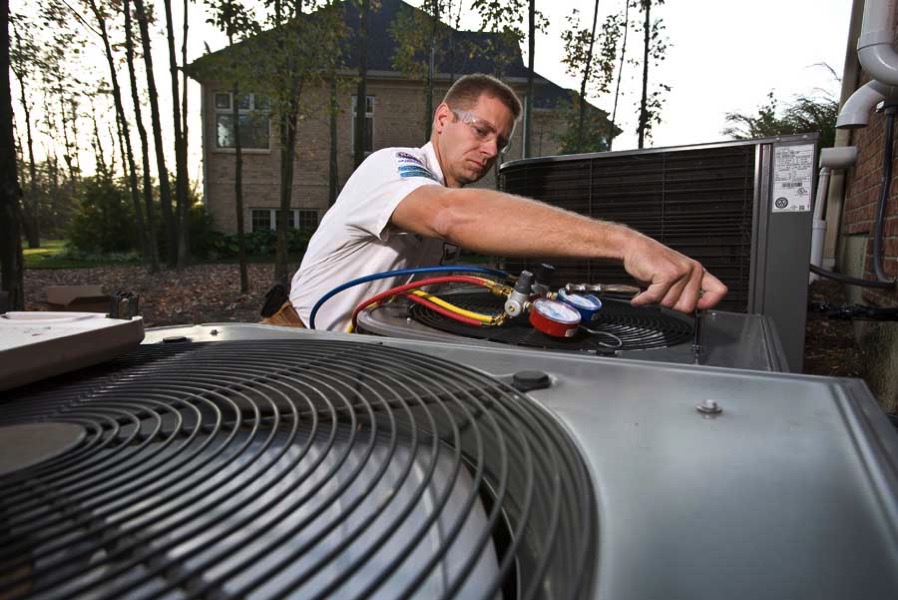

Did you know that the average lifespan of an heating, ventilation and air conditioning (HVAC) system is 15-20 years? Many systems can (and often do) last much longer, especially with proper maintenance, but in the U.S. many homeowners choose to replace or upgrade their systems more frequently. If your system is older than 20 years, you may want to consider replacement, even if it is still in good working order.

How I Kept My Lawn Green While Cutting My Water Usage by 60%
This post has actually been more than 4 months in the making. I started a lawn ‘makeover’ this past spring, when I believed our California drought ravaged our lawn was beyond salvation. I thought it was going to be a fruitless last-ditch attempt to green up our lawn while following the mandatory state water restrictions, but I was stunned with what actually happened. This past summer, while in one of the worst droughts on record, I was able to cut down my water usage by 60% and wound up with a greener, healthier lawn than we ever had.
I finally decided to share the results with you when Scotts® EveryDrop™ asked me to write a post educating people about the California drought crisis. I know many homeowners have given up hope for saving their lawns.. but I have been working on getting the perfect green lawn for more than 4 months, and have finally found success! It is possible!
I finally decided to share the results with you when Scotts® EveryDrop™ asked me to write a post educating people about the California drought crisis. I know many homeowners have given up hope for saving their lawns.. but I have been working on getting the perfect green lawn for more than 4 months, and have finally found success! It is possible!
How to Choose and Install a Low Flow Toilet

If you are using toilets installed anytime in the last century (okay.. it sounds crazy when I say it that way.. but I mean “Pre-2000”) it is pretty likely that you are either using way more water than you have to, or are using outdated technology which conserves water but is not very efficient at flushing waste or frequently clogs.
The toilets in our house were 1988 monsters using almost 4 gallons per flush. (For perspective, todays standard of “low flow” is 1.28 gallons.) If you are using a toilet from the 70s, you could be using as much as seven gallons! SEVEN GALLONS!! That is the equivalent of flushing a modern toilet more than five times. (Side note: if you are using toilet from the 70s.. it is probably pretty gross by now and you should change it anyhow!)

Today’s low-flow toilets are pretty amazing, considering that some of them use as little as 0.8 gallons of water and yet have astounding ability to flush a small pony down the drain (okay, maybe that is a slight exaggeration.. but they are much more powerful than their previous water saving counterparts.)
I’ve previously written about the pros of saving on your utility bills, and so this project was a no brainer. And to make it even better, our utility district has a $50 rebate on any Water Sense toilet, so this project practically paid for itself. (Most water districts do offer rebates, just check with your local company.)
In our upstairs bathrooms these are the toilets we had:

You can see how large the tank was in order to hold all the water.
It was just a huge WASTE even though they weren't in the most commonly used bathrooms. I chose a new 1.28 gallon per flush American Standard model as a replacement. I took a side by side photos with the new one (the ruler is for reference) to show you the difference in tank size when you covert to a water efficient model
 You also will notice the tank is tapered, to give you more flushing power with less water. Plus it takes up less space in your bathroom, which is never a bad thing right?
So how did I decide exactly which one was the best choice for me?
When figuring out what kind of toilet you want to upgrade to, there are lots of things to keep in mind.
TOILET SELECTION:
Cut Your Winter Energy Bill By Making Your Home More Efficient


Now that colder weather is moving in most of us will typically see an increase in home energy usage (and energy bills.) These increases are typically the result of things like the increased cost of heat (either electric, oil or natural gas), increased electricity usage (with decreasing daylight), and increased water usage (more clothing layers means more laundry!)
So, today I’m partnering with PG&E to share some quick tips on how I make my home more efficient and take some of the sting out of those huge winter energy bills. I have read a LOT of lists for ways to make my home more efficient, but today I'm going to share with you what I have PERSONALLY done to save money during the winter. I don't want to recommend something I'm not willing to do myself.
If you need a little motivation to get more efficient, you can win one (of seven) $100 Home Depot Gift Cards by entering the #PEGhome Instagram Photo Challenge on PG&E’s Instagram page (now through November 23rd.)
Guest/Kid Bathroom Makeover (Flashback Friday)

The full original reveal from 2011 can be seen here, and here is what it looks like today, more than 3 years later.
The first thing I did was take down the old brass sliding shower door and replaced it with a curtain (Full tutorial on that is a previous flashback Friday post)

We lived with the bathroom for a while like this until I couldn’t stand it for one more minute and decided it was time for a major (albeit cosmetic) overhaul.
I painted the walls (Martha Stewart’s Buckwheat Flour) and added a window treatment. I didn’t want a color that was too dark, but I needed a lot more contrast between the molding and the walls.
 Also, a quick tip: See how the curtain/valance is hung COMPLETELY above the window? It makes the long thin window look taller and doesn’t block any of the much needed natural light.
The most dramatic difference was cutting down and framing the mirror (full tutorial here.)
Removing Sliding Glass Shower Doors (Flashback Friday)

Welcome to another edition of Flashback Friday, where I look back at some of my favorite projects from my early days of blogging!
One of the first things I did, was rip out the brass sliding glass doors which were on the girls' bathtub. Not only were they ugly golden brass, but it was a GIANT pain in the butt to bathe your kids in a tub with doors.

First you need to remove the doors from the track, and then remove the three screws on each side of the track that hold it to the tub surround (or wall.)

The track may still be stuck down with caulk or liquid nails, so just keep prying it up until it pops off.


That is all the crap that collected under the track. Disgusting moldy crud. Fortunately it only takes a little elbow grease and a razor blade to get rid of it. (I did have to bleach some of the caulk to get the discoloration off.)

Once you have scraped and cleaned off all the caulk, you can fill the screw holes with a marine epoxy or caulk if you are so inclined. (This is what I used.) It will look better if they are filled, but it isn't 100% necessary since it is very unlikely you will get water in the holes. I had light 'faux marble' so it was easy to match it to the white epoxy, but if you have dark tile, you would be better off using the clear.
After filling the holes, all that is left to do is hang a curtain rod and shower curtain and the project is (mostly) complete:
After filling the holes, all that is left to do is hang a curtain rod and shower curtain and the project is (mostly) complete:

Once the doors were off, the brass fixtures were screaming to be replaced. What should have been a straightforward project turned into a little bit of a nightmare because the valve which supports the shower handle would only accept Price Pfister faucets manufactured before 1994 (it was from the "09 series" in case you have one too!)
Therefore used an universal retro trim kit for the internal handle mounting hardware and splash guard along with the actual Price Pfister Pasadena handle, spout, and shower-head.


The total cost for the entire project was about $150 for the new faucet hardware, curtain rod and curtain. Plus I even had someone buy the shower doors to use in their rental property (Those poor tenants!)

Sharing at these parties.
Guest Bathroom Makeover (Flashback Friday)
Welcome to the first edition of Flashback Friday, where I feature old posts from my early days of DIY'ing and blogging! You will have to excuse some of the photos, simplicity of projects and lack of decent tutorials. I was just a baby blogger who was doing everything for the very first time.


This bathroom was on the main level of the house, and was the bathroom that all the guests would use. I was embarrassed to have people use it. The giant WOODEN towel bar (which was actually moldy) and fleshy colored ceramic tiles which looked straight out of a Chinese restaurant.


The vanity was orangey oak, which had gotten water damaged over the years. Here is a photo of it once I removed it, you can see exactly where it sat next to the tub. Gross. Here is the full tour of the "before" from back in 2011.

My budget for this makeover (which was pretty much an entirely new bathroom except for floors, tub and toilet) was $1000. The vast bulk of the money ($550) went to having the walls and tub surround professionally reglazed pure white(since there was NO SAVING that ugly tile.)


The previous remodeler had illegally spliced Romex wiring into the house's original knob and tube. It was a fire waiting to happen. And they hadn't even put in a junction box, just hid the splice behind the cabinet. NOT COOL! I had to hire an electrician for that part of the project.
 For additional in-progress photos, and more detailed descriptions of what I did, visit this old post.


I would say it was a VERY VERY successful transformation, especially for a first time DIY'r!


Back in April of 2011, I tackled a horrific guest bathroom in our 1905 Victorian townhouse we had bought only a few months before in Boston, MA. This house would later be known as The Money Pit, because of the nightmarish problems I encountered with every project.
I was a BRAND SPANKING NEW DIY'r and I had never done a project anymore complicated than painting without the help of my dad. I hated this bathroom soooo much, it was the push I needed to attempt my first plumbing project. It was the success here that led me to tackle bigger and 'scarier' projects. This was the project that started it all!
The medicine cabinet was horrible and stuck out way too far (I would later find out why!) and the dressing room lights were extremely dated.
The vanity was orangey oak, which had gotten water damaged over the years. Here is a photo of it once I removed it, you can see exactly where it sat next to the tub. Gross. Here is the full tour of the "before" from back in 2011.
My budget for this makeover (which was pretty much an entirely new bathroom except for floors, tub and toilet) was $1000. The vast bulk of the money ($550) went to having the walls and tub surround professionally reglazed pure white(since there was NO SAVING that ugly tile.)
$550 well spent!
I painted the rest of the room Martha Stewart's Brown Alpaca from Home Depot. (That paint brand is no longer available but you can still get the Martha Stewart paint line color in Glidden at Home Depot) .
I also added a new white stock vanity, faucet, shower curtain and towel bars. I also had grand plans to just wire in a new light fixture, but what I found when I removed the medicine cabinet made that impossible (especially for a first time DIY'r!)
The previous remodeler had illegally spliced Romex wiring into the house's original knob and tube. It was a fire waiting to happen. And they hadn't even put in a junction box, just hid the splice behind the cabinet. NOT COOL! I had to hire an electrician for that part of the project.
So how did it look when it was completely finished?
Here is a breakdown of my costs:
$550 Tile Reglazing
$148 Vanity
$36 Faucet
$28 Wall Paint
$20 Door Paint and Door Knob
$44 Plumbing Supplies (piping, trap etc.)
$93 Light Fixture
$47 Towel Bars, TP Holder, Shelf, Coat hooks
$30 Mirror
$3 Trim Molding (around vanity)
=============
$999 + $299 for electrician<---- b="">1298
The original reveal can be found here.
I would say it was a VERY VERY successful transformation, especially for a first time DIY'r!
Sharing at these parties.
Subscribe to:
Posts
(
Atom
)


