


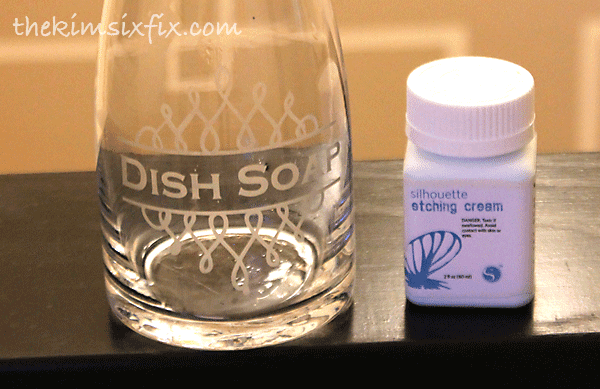
One of my most popular tutorials is “How To Etch Glass” where I demonstrated the etching process in a photo tutorial. I field DOZENS of questions about the process every month. In that post I use a vinegar bottle (turned soap dispenser) as my sample project.
 So I followed up that original post with another one and this time etched mugs for Father’s day.
But I am still getting questions about all the steps, and most of these could be readily answered by just watching the entire process from start to finish.

So today (and in conjunction with the Dollar Store Design Squad monthly challenge, I’m going to share how you can etch glassware (like glasss or mugs) using etching cream.
And now I want you to visit the other fantastic February Dollar Store Projects by the other members of the Design Squad:
And now I want you to visit the other fantastic February Dollar Store Projects by the other members of the Design Squad:

When you see how easy this process is, you are going to want to buy dozens!

And for all of you who already love etching as much as I do, as a fun added bonus I’m throwing in this silly Dilly Dilly cut file, which is perfect for all the Bud Light lovers out there. If you don’t know what Dilly Dilly refers to, you MUST watch this:
Glass Etching Supplies:

- Dollar Tree Glass Steins (although their Glass Mugs, Pub Glasses, or Pilsner Glasses would also look awesome etched as well!)
- **Stencil Vinyl (you can use regular vinyl, but it isn’t nearly as sticky. Stencil vinyl is INTENSE.)
- **Transfer Paper
- **Etching Cream (I used Silhouette brand, but most people swear by Armour Etch)
- **Needle, Pick or Weeding tool (mine is from Harbor Freight!)
- **You can buy these as a complete kit from Silhouette
- Electronic cutting machine like Silhouette or Cricut (I cut mine on the Cricut, but the settings for the Silhouette are included in the kit materials)
- Cotton Swabs (so you don’t etch your fingers.. and I don’t want to ruin a paintbrush) Pick these up at Dollar Tree while you are there!
- Scissors
- Stencil Cutting File:
Video Tutorial:
A few tips from the video:
- Make sure you glass is CLEAN! Any oil or dirt will repel the etching cream and leave you with streaks.
- Cut the stencil with LOTS of overhang. You can see in the video how large the stencil was. This helps when you go to remove the cream. Better safe than sorry!
- When applying stencil vinyl make sure there are NO folds or bubbles and the edges are down tightly.
- Apply the cream evenly and constantly ‘swirl’ it around with the swab. You don’t want bubbles or clear spots where the cream was too thin or too thick.
- Make sure you have removed ALL the cream before you take off the vinyl. In this video I used a wet cloth, I also like just running the entire piece under running water.
- To really ‘set off’ your stencil, I was the glass with windex. The vinegar dries nicely and leaves the etched area ‘whiter’ Oil and grease from you hands will make the etched area look blotchy.

The number one question I get:
HOW LONG SHOULD YOU LEAVE THE ETCHING CREAM ON?
Well, it depends. In this case the cream was on less than 3 minutes. It etches ON CONTACT so you will get a mark immediately. I wouldn’t leave it much more than 4-5 minutes. You can always wipe if off and (as long as you don’t remove the stencil) add more and keep going. It doesn’t hurt to do multiple batches!Now these times are going to vary depending on the brand and age of the etching cream as well as the type of glass. This is my original cream from more than 4 years ago. It isn’t as potent as it once was. Armour etch suggests a 5 minute etching time, and glass with a texture or cloudy finish will require longer etching time in order to give you the most contrast.
I hope that was helpful. All my tricks, tips and techniques crammed into a 2 minute video. If you create any etched glasses, I’d love to see them! Leave a photo in the comments.
If you liked this Silhouette/Cricut project, you may like these:


I love this mug so much!
ReplyDeleteLoved this project Kim. I'd forgotten I have etching cream and it's so much fun to use. Pinned!
ReplyDelete