
Thanks for Airstone for sponsoring this post!

I am so excited to finally share my big fireplace makeover. It has been half-done for a while now, but today I finally finished it and took some quick photos. But before I get to the full reveal, I wanted to remind you of the ‘before.’ This is what the fireplace looked like when we bought the house:

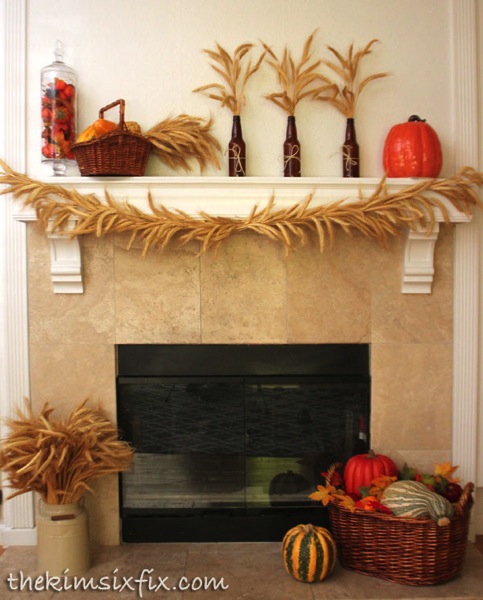
Pretty nondescript, and I always felt like the mantle was too high in comparison to the actual fireplace opening. There was something not right with the proportions. I have been doing my best to work with that extra gap by using swags and banners whenever I decorate the fireplace, but it is always A really noticeable large blank open space. Here is this year’s fall mantelscape for example.
 The other thing I didn’t like about it was the travertine blends in with the wall and the mantel. It is one monochromatic expanse. I knew that redoing the fireplace with traditional methods was going to be a really expensive, so I”ve been putting it off.
But then I saw this product at Lowe’s and I had a lightning bolt moment. I could use FAUX stone to get the look of a stone fireplace, but without the expense or headache of installing an actual stone fireplace. So I contacted the people at Airstone and they sent me a few boxes to try.
 I would use Airstone again in a heartbeat. I was able to completely transform my entire fireplace in less than 5 hours. It looks and feels like real stone, only it is super lightweight (it reminds me of pumice stone) and cuts with a hand saw. No fancy tools required.
I could have attached the stone directly to the travertine, but I wanted to not keep it as flush to the wall as possible so the first thing I had to do was pull down the old tile. This was by far the worst part of the the project:

The tile didn’t want to come off the backer board, so I ended up having to remove and replace it.. ALL OF IT. It was a huge mess.

Once I got it all down, I had to replace the backer board and patch all the seams:
 The rest was smooth sailing.
 I received 2 boxes of natural edge stone (meaning the edges were finished to look like cut stone) and 1 box of flat edge (which are used side by side with each other for interiors seams only.) The boxes come sorted into the various colors (I was using the Autumn Mountain collection which is browns and tans) and so I needed to lay out all the stones in advance to get the correct mix of colors and to make sure that all my unfinished edges were made up of the natural edge stones.
To do this I measured my surround and mapped it out on the floor in painters tape (since I couldn’t lay them out on the wall vertically.)
 I placed (and adjusted) all the individual stones until I got a look I was happy with:
I also was able to cut down the stones to fit the space at this point. To cut Airstone, you only need a hacksaw. I never even had to leave the living room. I used a miter box mostly so I wouldn’t cut into my wood floor. You don’t actually have to use one:

Remember when cutting, you need to hide the cut edge on an inside seam, you always want the natural finished edge to be exposed. It took a while, but eventually I went around all the edges and got everything dry fitted.
 Next was the actual installation, and if you can butter toast, you can install this stuff. It is a lot easier than regular tile. You just ‘back butter’ the individual tiles and smoosh them (technical term) into place. Back-buttering is just like it sounds: Slathering on a thick later of adhesive to the back of the tile:
I started at the bottom of one side and worked my way up, allowing the previous row to support the weight of the row above it.
 This part went really quick. I probably go all the tiles stuck up there in less than 2 hours.
One tricky area was the row above the fireplace opening. The stones wanted to slide down the fireplace, so I used my old window to prop them up. Worked like a charm:
 Eventually I go to the top row and it was complete. **Note: I wish I had installed my corbels at this point and put the stone around them. I didn’t have them at the time (they were custom ordered) so I plowed ahead without them and the end result isn’t as nice.
 The smaller stones and varying colors do break up the space above the fireplace opening, and so it looks more proportional. Here is what it looks like decked out with for fall:
 It looked great. I like how rustic it came out and I could have stopped there but based on previous experience I knew I wanted to add corbels.
You may not realize it, but this is a double sided fireplace. The other side was IDENTICAL to it. Here it is on move in day:

Looks familiar no? I previously gave that side an update by painting the wood work and adding corbels to the mantel:

I love how they changed the look of the fireplace and I knew I wanted to do that again on this side (here is what the other fireplace looks like today):
I didn’t this set to be as large or as formal since that isn’t the style of the stone, so I ordered this smaller, more simple type from Amazon, and installed them:

Now I just love the new look. Instead of a strange floating horizontal mantel, it now looks like it is supported, like a shelf.

The transformation is pretty amazing and now finally the fireplace really stands out against the wall color:
 You can really tell the difference when you look at them side by side:
I do have plans to spray paint the brass like I did on the other side (although I hate it less with the stone.. it doesn’t’ bother me as much.) I am just so excited that I will have a new style/look of fireplace to decorate for Christmas this year instead of having two that are identical.
Now I just have to get through Thanksgiving, clean up all the fall stuff and move on to Christmas.. At least I can check the fireplace off my list!


