

I'm pretty excited to share my new vertical garden (thanks to Pennington!) They sent me a system to try out, and I am really happy with how easy it was to install, and how great it looks!
I told you about about my "small spaces" dilemma in a previous post. My big big problem spot was in one planting bed that housed the irrigation manifold. Because you need access to it, and because it is in the middle of the bed, I couldn't plant anything there. Plus it was ugly. I wanted to hide it.

With Pennington, I was able to GROW UP! I love how I can finally get some color in that part of the yard by installing my garden vertically.. above the planting bed.
From my back door, I look out and now this is what I see..

So much nicer than a big blank expanse of fence line! And you don't even notice the ugly manifold!
Step 1 (Optional): Find an assistant:

REAL Step 1: Find your location
The system can be installed in drywall, wood or masonry facades (including brick, stone or stucco). I installed it on my fence. You should try to use studs if they are available.
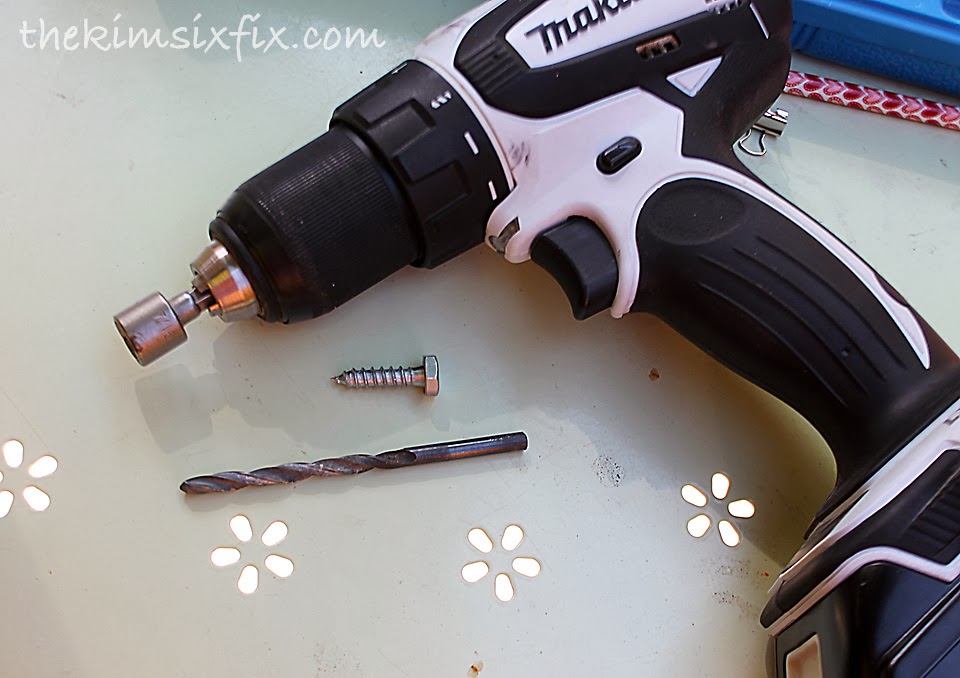
Step 2: Choose the right mounting hardware.
In my case I used three 1/2 inch lag bolts. You will need to pre-drill holes for these large screws.
Step 3: Install/Level the Horizontal Rail

Step 4: Mount the Verticals Rails on the Horizontal Rail
There is a "stop" at each end, so you slide them as far out as you can and they can't be pushed off the end.

Step 5: Add Decorative Top and Bottom Caps as well as Top Rail Cover
The top caps and top rail cover are decorative and just cover up the mounting hardware. The bottom caps actually hold the bottom of the vertical rails in place.

Step 6: Level one vertical rail and screw in bottom bracket
 |
| Image courtesy of Pennington |
Step 7: Install/level other vertical rail
You can either measure to make sure the top and bottom of the rail are equi-distant apart, or (like I did) just use on the wood planks to make sure everything will fit.

Step 8: Install Horizontal Wood Planks
The planks come shipped with the mounting brackets attached in reverse. You need to remove the brackets and figure out how you want your garden configured. Once you re-attach the bracket to the board (in place) you won't be able to move it.

Step 9: Add all your accessories.
From pots and pot rings, to planter boxes and hooks, the configurations are endless. You can use Pennington accessories or your own. It is fully customizable.
I tried out a couple of options before I settled on my final layout:
The simple "plants only" look:

Only a few plants, mixed with gardening tools, plus I added a decorative element to the top mounting rail:

This is the version I ultimately settled on. The planters filled with plants, and the hooks filled with gardening goodies, I ended up equally spacing out the three rails, but if you had really tall plants you could move the rails to accommodate the different heights:

I think my
favorite part is that when I move, the entire system can come down
without any trouble and I can take it with me. It is literally
installed with 6 screws! That is it! The entire rail system was contained in these
two packages:

Cool isn't it?


 They sent me a system to try out, and I am really happy...)