
Supplies
- Scrapbook paper
- Thin cardboard (cereal box thickness)
- Scoring board (or ruler) and stylus
- Glue stick or other flat adhesive
- Optional: repositionable adhesive
- Scissors
- Hot glue
- 18-gauge wire
- Wire cutters and pliers
- Printable gift tags
- Box diagram printable (visual instructions to make the box)
Directions
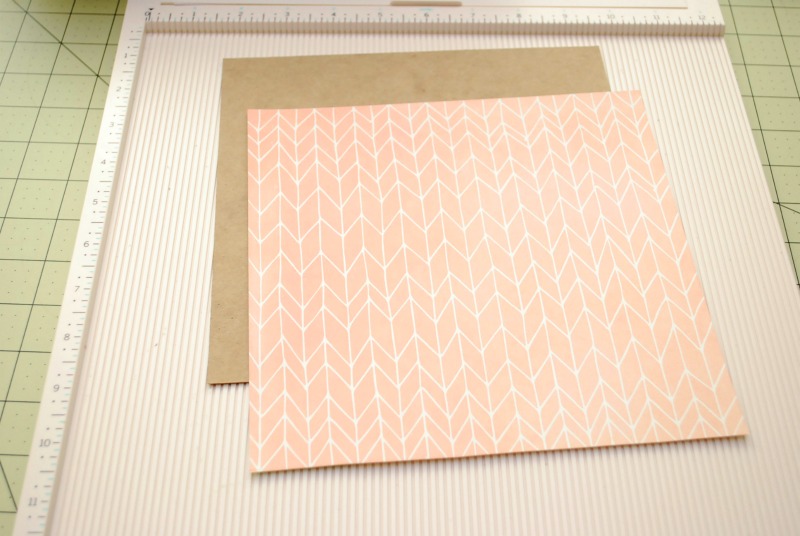
Cut an 8" square of scrapbook paper and an 8" square of thin cardboard. This will be the inside of your box. Adhere the scrapbook paper on top of the cardboard.
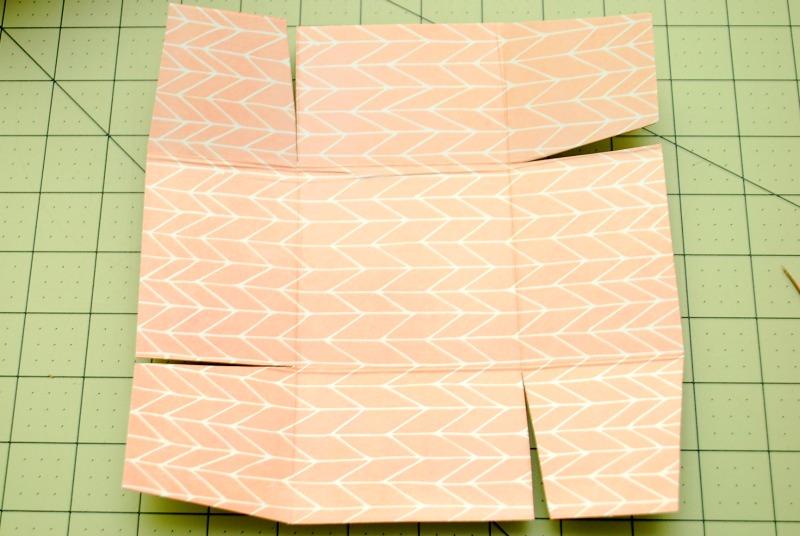
Place the scrapbook paper/cardboard in your scoring board and score 2 3/8" inches from each edge. So, score one side, then turn the whole thing 90 degrees to score the next side, the same length from the edge (notice in the pic below, the direction of the paper has turned). Turn and score two more times to create a tic tac toe of score lines, creating a 3 1/4" square in the middle. This works for your standard 3" stack of sticky notes and the height of the box will accommodate maybe 600 sticky notes.

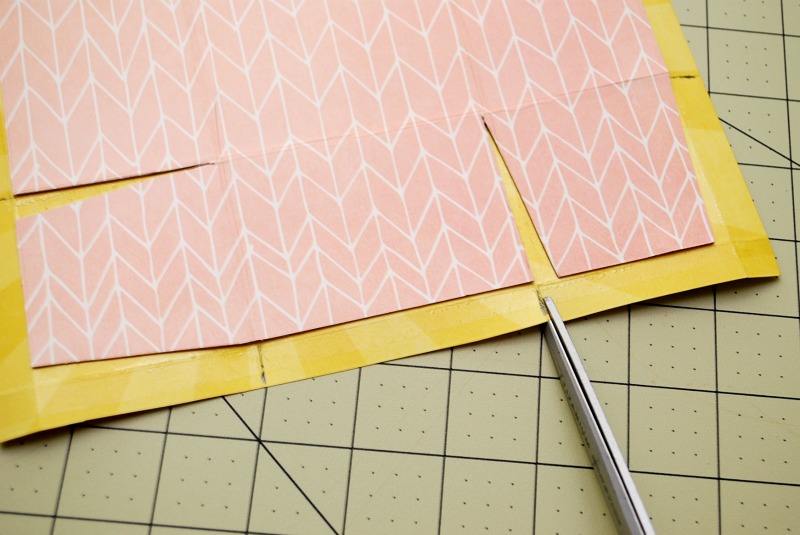
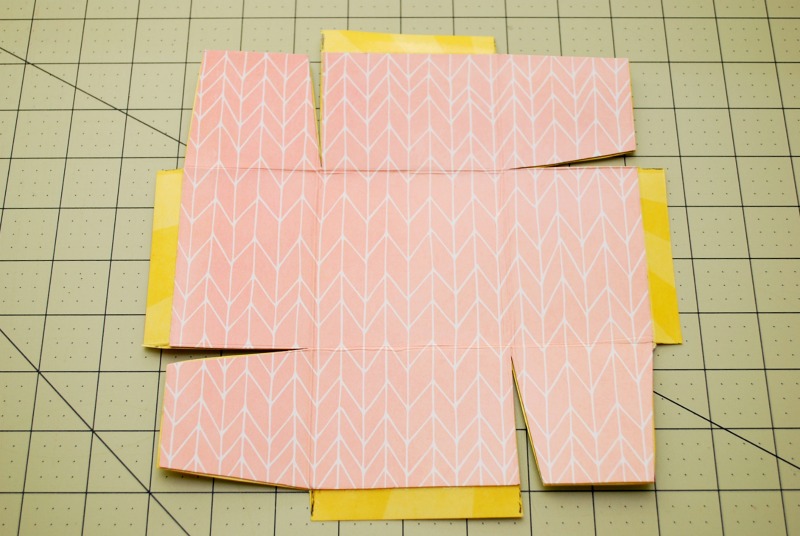
Now, trim some notches on every other fold. First cut along the fold as shown, up to the middle square. Then, go at an angle and cut out a triangle, with the tip of the triangle where all of the folds meet. Do all around. These will be the tabs that connect the box together.
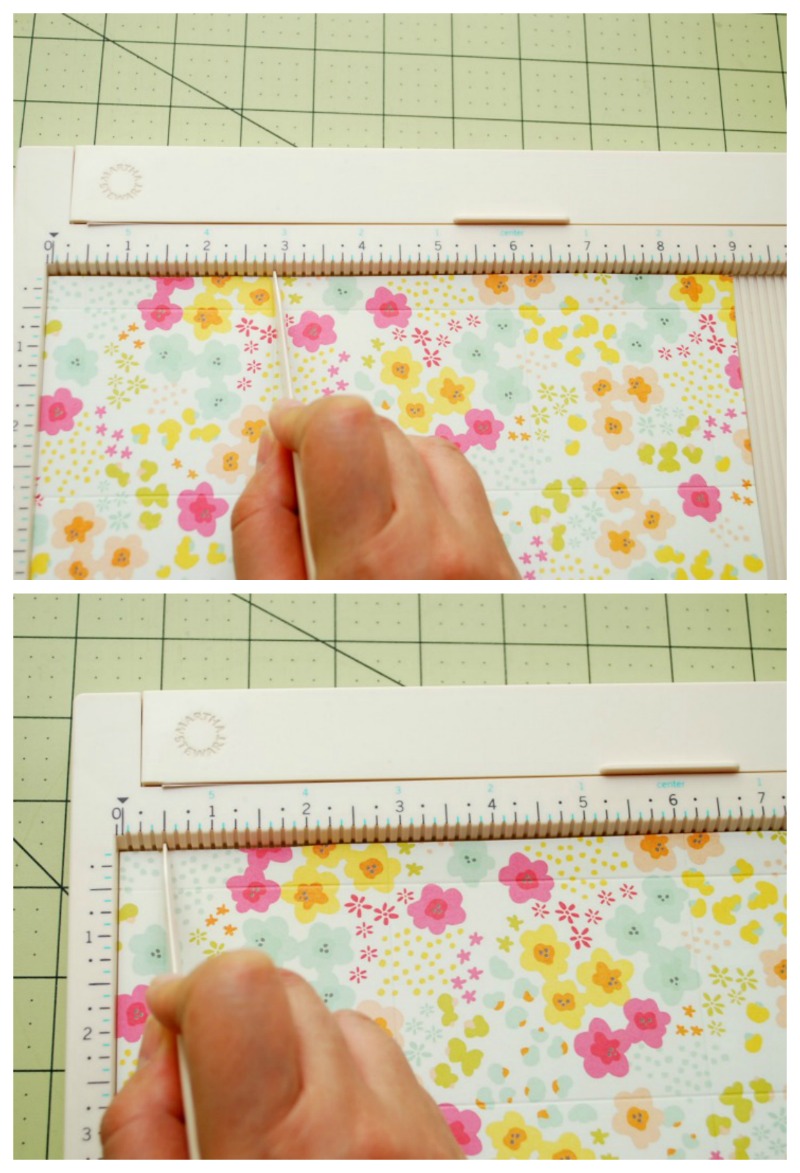
Cut a 9" square of scrapbook paper and place it in your scoring board. This will be the outside of your box. This time, you'll make two score lines, one at 2 7/8" from the edge, and one just 1/2" from the edge. As before, turn your paper 90 degrees and score each side. The middle square will also be 3 1/4".
If you have repositionable adhesive, apply it to the back of the 9" square. Then, adhesive side up, line up the 8" square with the notches cut out with the 9" square. The center square and all of the folds should match up and you should have 1/2" sticking out all around. If you're not using repositionable adhesive, you can trace the 8" square onto the 9" square with a pencil.

Cut slits on the 9" square to create tabs at each of the center sections on each side. Cut the slits along the folds.
Then, cut off the rest of the 9" square. Cut out the notches as well. Do not cut the area in between the slits. The area between the slits will be our tabs that fold over the raw top edge of the 8" square.
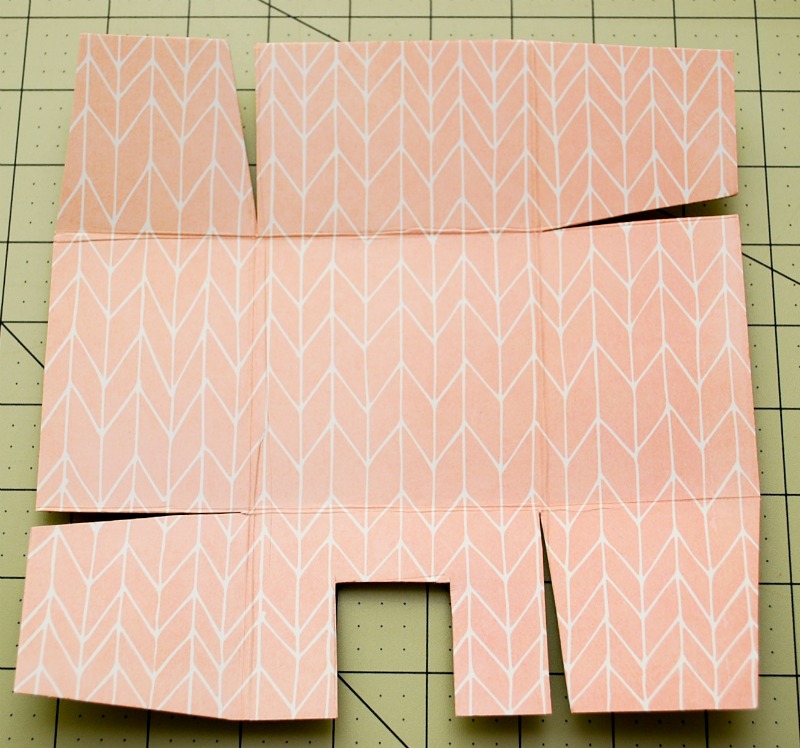
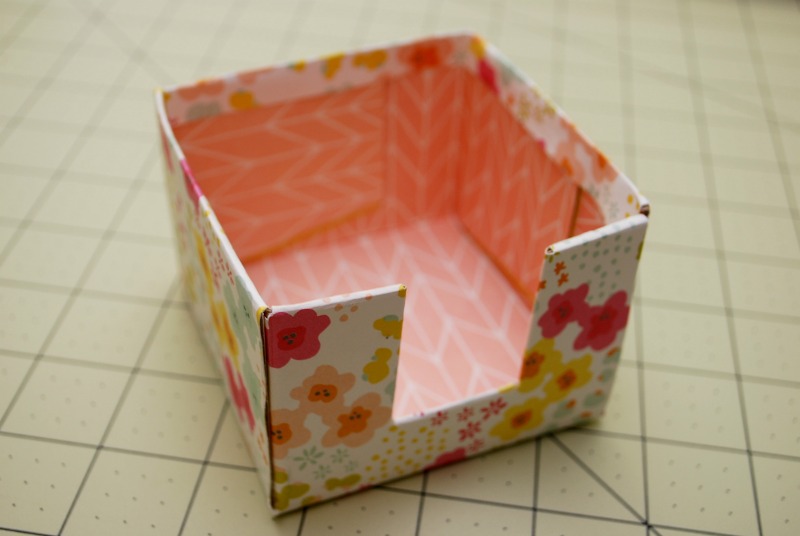
At this point, you would be able to make a regular box, but for our sticky note holder, we want to create a rectangular opening in the front to make it easier to grab sticky notes. So now, take just the 8" square and cut a rectangle. The sides of the rectangle should be 1" from the folds, and it should be about 1 1/2" long.
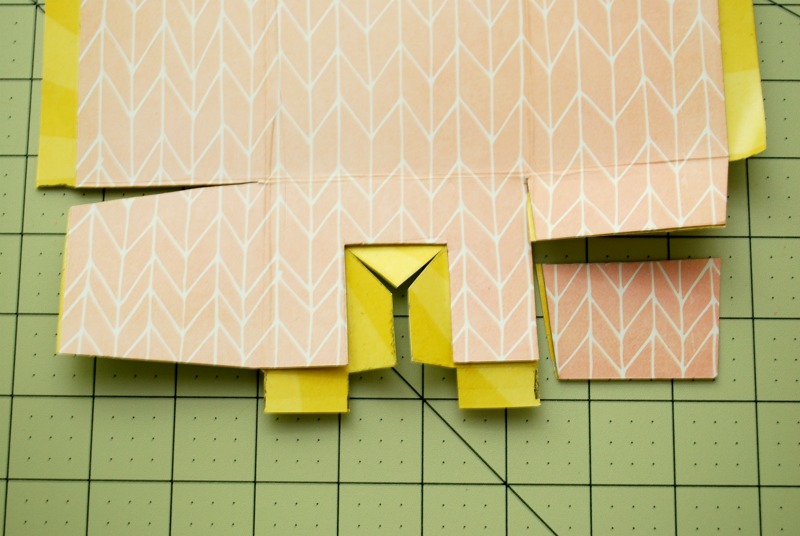
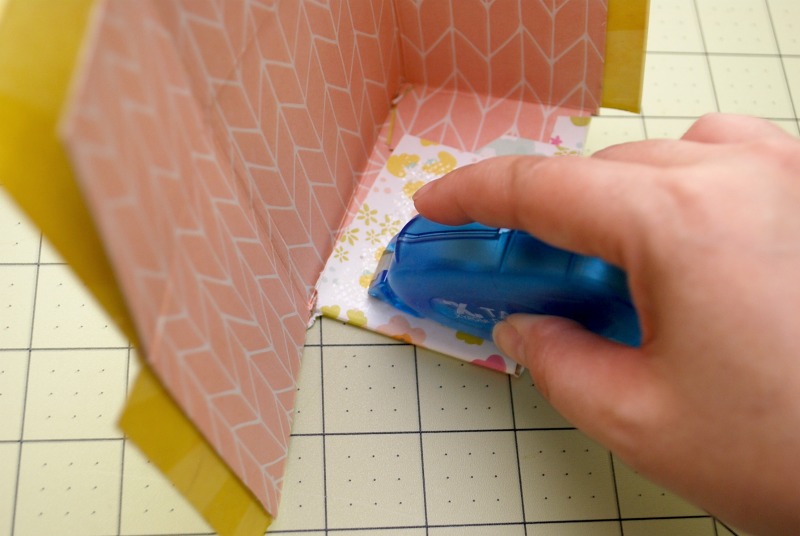
Apply adhesive to the back of the 8" rectangle and again place it on the back of the 9" rectangle, lining up all of the folds and all of the tabs you've cut out. Now we'll make the tabs to wrap around the raw edges of the rectangular opening and the top edge. First, cut out the section above the rectangle's opening and remove it. Then, cut a Y shape inside the rectangle to form tabs. Finally, trim just the tab from the 8" square, just the one to the right of the cut-out rectangle so it doesn't show through the rectangle. Now we're finally ready to form the box!
Apply adhesive to the cardboard tab that you just trimmed and fold the box so it attaches to the inside of the box. Then apply adhesive to the tabs and fold over the top edge of the box, catching the cardboard tab. Then, add adhesive and fold over the Y-shaped tabs in the rectangular cutout and adhere to the inside of the box. And apply adhesive to the remaining tab on this side and fold it over to the inside of the box.

The rest of the large cardboard tabs are easy to attach, just add adhesive to the tabs and press.

All done with the box!

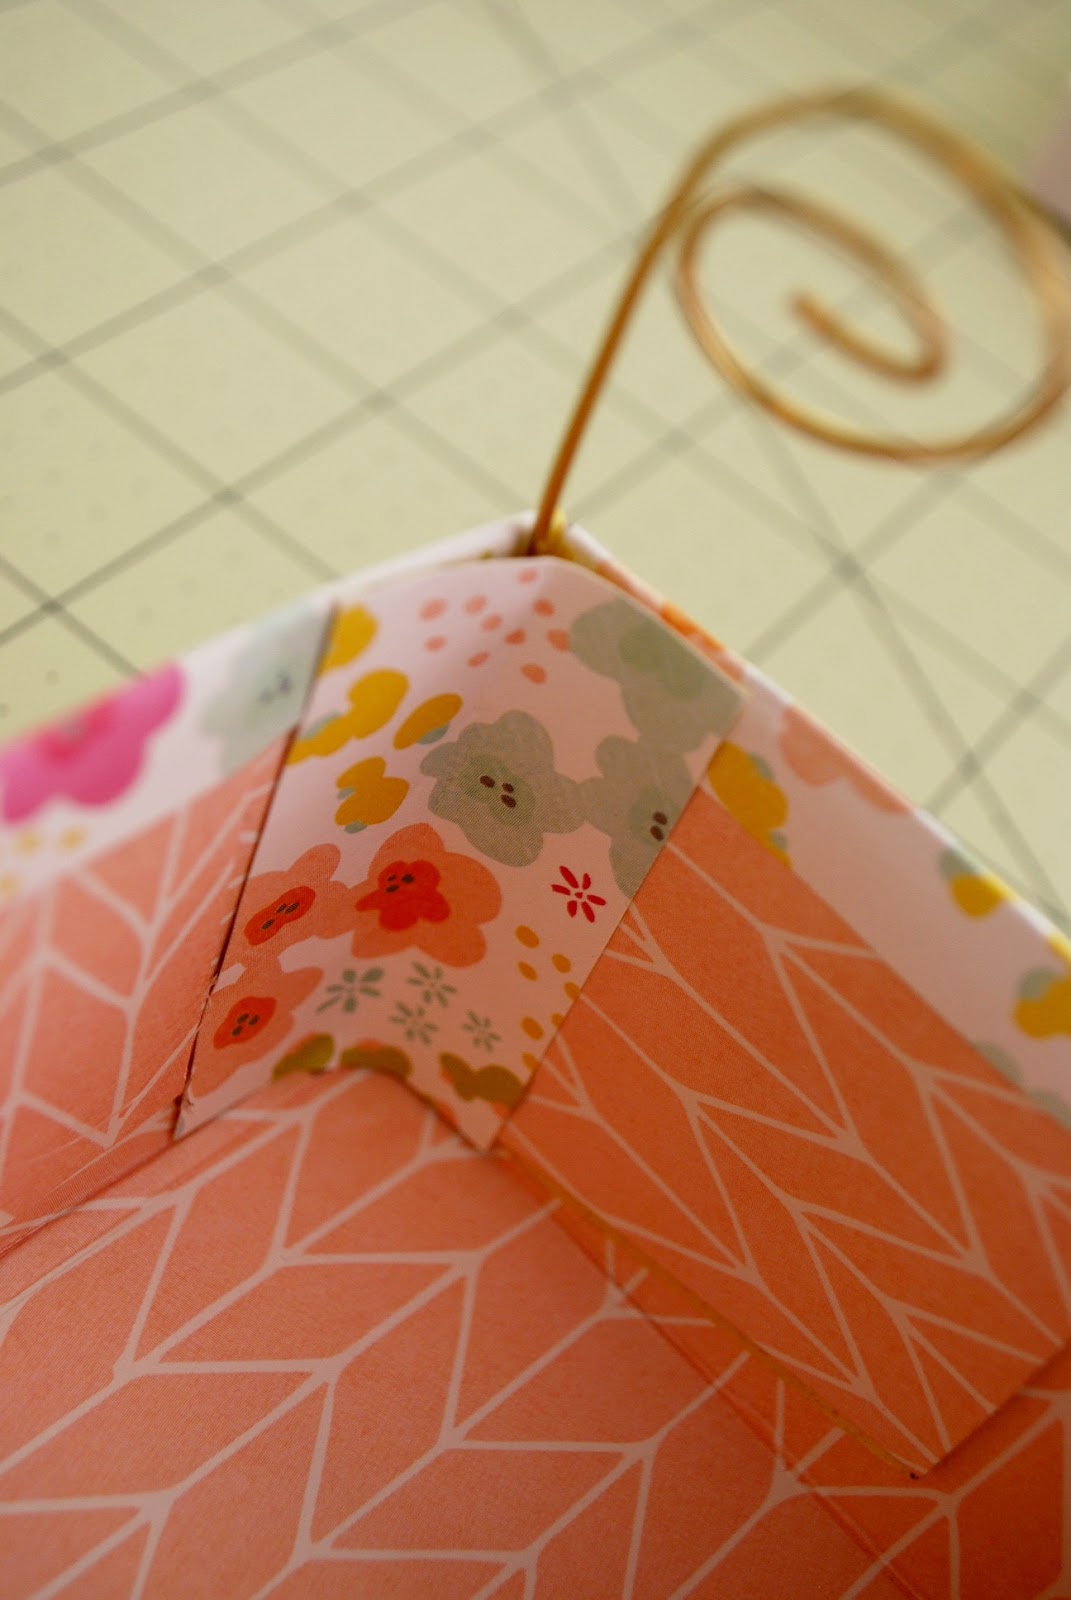
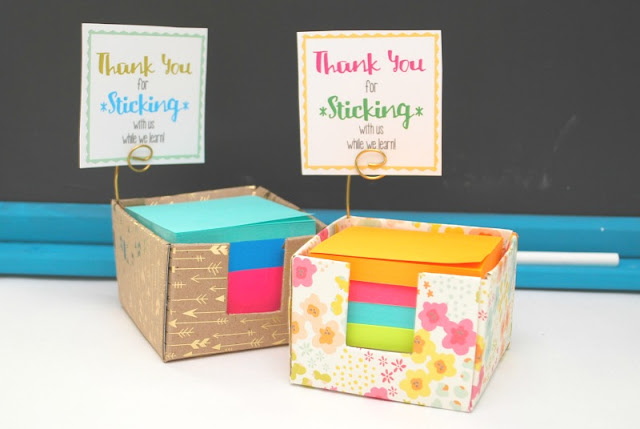
You can stop here, or your can make a little photo holder made with wire. Cut an 8" piece of 18 gauge craft wire and starting at about 3" from one end, form a swirl with your pliers. It should swirl around 3 times.

You can stop here, or your can make a little photo holder made with wire. Cut an 8" piece of 18 gauge craft wire and starting at about 3" from one end, form a swirl with your pliers. It should swirl around 3 times.

Hot glue the straight end to one of the back corners of the box. Use a skewer or something to press the wire into the glue. And last step...cut a piece of paper about 1 1/2" wide as tall as the box, fold it in half, and glue it to the corner to cover the wire.

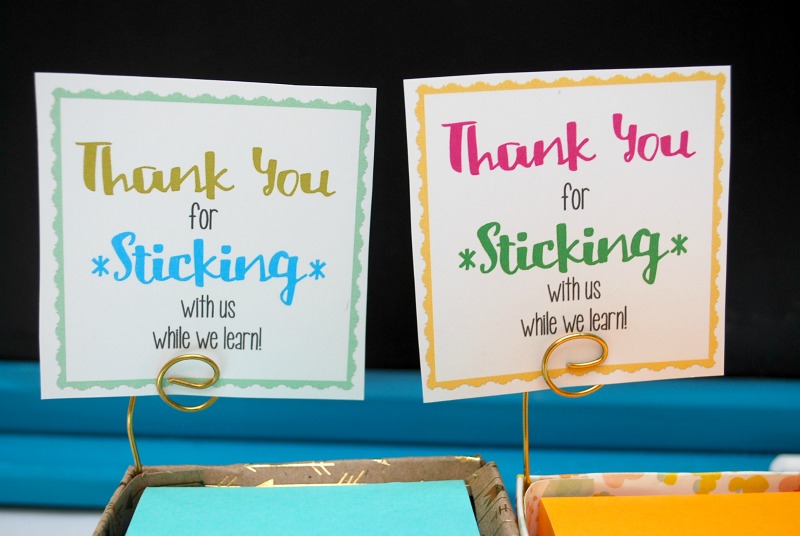
I've created a square printable gift tag with a sticky note pun in two color schemes, to present to your teacher. Just insert it into the photo holder.

I know this tutorial had a lot of steps but it's really not bad at all! I do recommend practicing a few times with scrap paper before cutting your good paper and cardboard and do refer to the diagram printable for a clearer visual of all of the scores and cuts you need to make. And after making a few, you'll be making them in your sleep!

Happy Back to School! - Steph @ The Silly Pearl


